I'm taking a quick breather from all those quirky hats...
In my Ravelry group this month, we're looking at ideas for STASH BUSTING your leftovers...
You know all those little bits and bobs you end up with at the end of other projects? Not the super short tiny ends... but those quarter balls... not big enough for another project, but not small enough to throw away?
I promised that I would share some ideas with my friends there... and if you're a Ravelry member, you can check out the discussion here.
But here's the details for those of you not on Ravelry.
My all-time favourite knitting stitch for stashbusting:
I call it MOSS STITCH… but depending on where you hail from, you might know it as SEED STITCH.
It’s a simple stitch - but hugely effective.
You just K1, P1, K1, P1, K1, P1… over and over again… then on the next row or round, you do the opposite - and K all of your P stitches, and P all of your K ones.
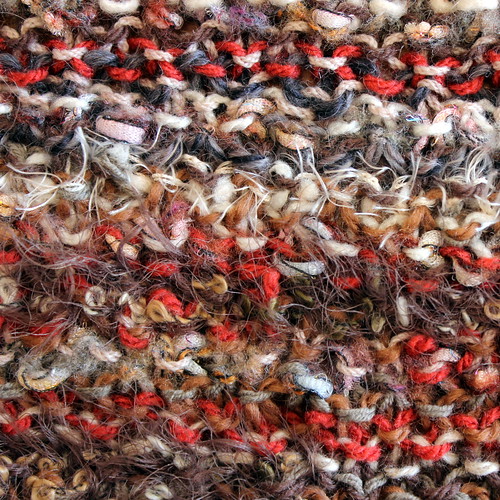
But what I love is the way that it weaves your colours in together. You don’t end up with clearly defined rows or stripes, but instead have more of an overall meshing of colours… Which is an excellent way to blend your scraps together.

In this project, I’ve used an assortment of browns and creams… but don’t be afraid to throw together completely contrasting colours… IT STILL WORKS UP A TREAT.
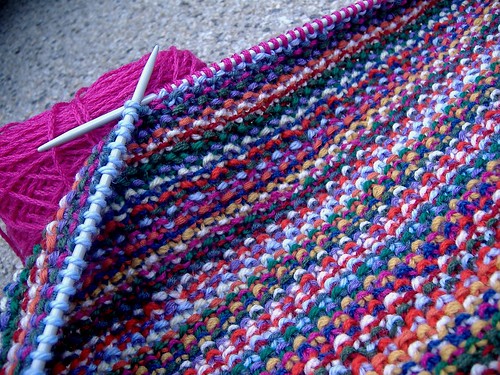
Take a look at this cushion cover I made a few years back:
It uses a bunch of different colours - from greys to greens, reds to purples, and whites to blues…
There was NO PLAN with those colours, and NO DISCRIMINATION… I just grabbed what was lying around, and started knitting.
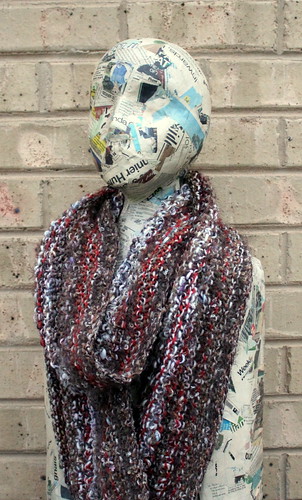
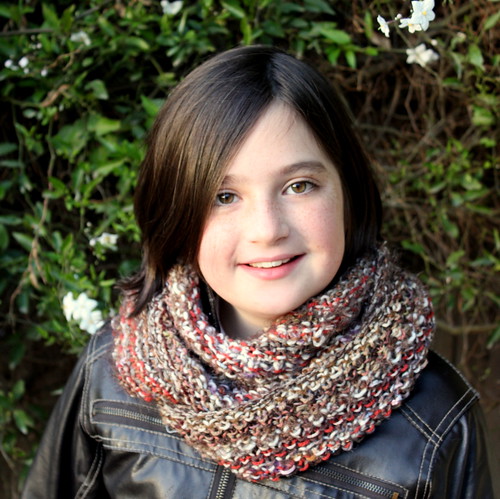
But this time I’ve made myself a SUPER DOOPER LOOPER...
Pattern available as a free download: download now
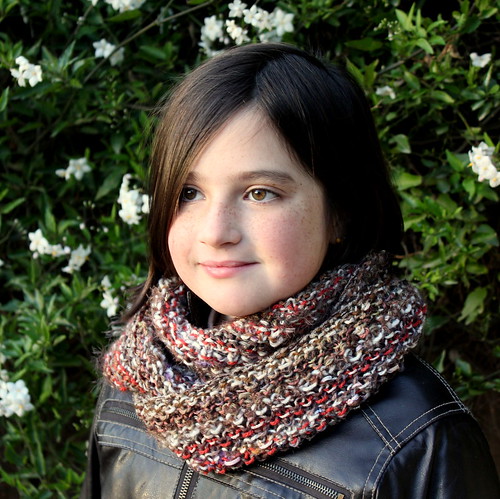
Basically it’s a long looped scarf.
Mine can be loosely looped twice around the neck, or can be wrapped three times for a more snug scarf on those chillier days.
I wanted quite a bit of drape in the scarf, so I’ve gone up to a larger needle size.
My scraps are mostly 8 ply/DK weight - and I would generally knit those with 4mm needles. So for the scarf I’ve gone up and used 6mm needles.
I wanted a loop 185cm (73 inches) around. I did a quick swatch and learned that I had 11 sts per 10 cm. So I cast on 203 sts.
If you cast on an ODD number of stitches - then you will just need to K1, P1 eternally - and don’t need to pay any attention to where each round begins or ends.
Then I worked in the round for 36 rows (13 cm or 5 inches) before casting off loosely in moss/seed stitch.
(PS. One day I'd LOVE to make a blanket using this method... I don't have the time right now... but maybe you'd like to try one?)
In my Ravelry group this month, we're looking at ideas for STASH BUSTING your leftovers...
You know all those little bits and bobs you end up with at the end of other projects? Not the super short tiny ends... but those quarter balls... not big enough for another project, but not small enough to throw away?
I promised that I would share some ideas with my friends there... and if you're a Ravelry member, you can check out the discussion here.
But here's the details for those of you not on Ravelry.
My all-time favourite knitting stitch for stashbusting:
I call it MOSS STITCH… but depending on where you hail from, you might know it as SEED STITCH.
It’s a simple stitch - but hugely effective.
You just K1, P1, K1, P1, K1, P1… over and over again… then on the next row or round, you do the opposite - and K all of your P stitches, and P all of your K ones.
But what I love is the way that it weaves your colours in together. You don’t end up with clearly defined rows or stripes, but instead have more of an overall meshing of colours… Which is an excellent way to blend your scraps together.

In this project, I’ve used an assortment of browns and creams… but don’t be afraid to throw together completely contrasting colours… IT STILL WORKS UP A TREAT.
Take a look at this cushion cover I made a few years back:
It uses a bunch of different colours - from greys to greens, reds to purples, and whites to blues…
There was NO PLAN with those colours, and NO DISCRIMINATION… I just grabbed what was lying around, and started knitting.
But this time I’ve made myself a SUPER DOOPER LOOPER...
Pattern available as a free download: download now
Basically it’s a long looped scarf.
Mine can be loosely looped twice around the neck, or can be wrapped three times for a more snug scarf on those chillier days.
I wanted quite a bit of drape in the scarf, so I’ve gone up to a larger needle size.
My scraps are mostly 8 ply/DK weight - and I would generally knit those with 4mm needles. So for the scarf I’ve gone up and used 6mm needles.
I wanted a loop 185cm (73 inches) around. I did a quick swatch and learned that I had 11 sts per 10 cm. So I cast on 203 sts.
If you cast on an ODD number of stitches - then you will just need to K1, P1 eternally - and don’t need to pay any attention to where each round begins or ends.
Then I worked in the round for 36 rows (13 cm or 5 inches) before casting off loosely in moss/seed stitch.
(PS. One day I'd LOVE to make a blanket using this method... I don't have the time right now... but maybe you'd like to try one?)
But here’s the trick to keeping those colours moving: Don’t let your colours meet!
What do I mean by that???
Always change colours before you get to the end of the round, so that you don’t work one stitch on top of the other in the same yarn.
In fact, I like to stop about 10 stitches before my colours overlap.
Then I introduce the next colour…
Not all of my yarn scraps were long enough to work an entire round in - so I just added new colours as I needed or wanted to.
Here’s the trick for colour changes without pesky weaving in:
Introduce your new colour before you finish with the old one.
Work with the two yarns together for the next 6 - 8 stitches, then snip the old yarn and continue with the new one.
That’s it. You’ve just woven in your ends!
When the project is finished, and you have washed and blocked it (if that’s part of your plan) then you just snip off all those loose tails. BUT NOT THE STARTING AND FINISHING TAILS. They will need to be woven in separately.
When you snip the tails, don’t cut them too close to the stitches. Leave about 3mm so that they don’t pull out of the stitch immediately, but they don’t stick out either.
Because of the loose stitches in this scarf, the odd tail might slip out. They do keep in place better when your gauge is tighter.
But don’t stress it! Just leave them out - or poke them back into place with your fingertip. Life’s too short to stress about that stuff…
And if you want a really scrappy look to your work - leave those tails at about 25 - 50mm (1 - 2 inches) and make them a feature.
Pattern available as a free download: download now

I use that knot join all of the time... I AM working on a never ending granny square king size afghan, so it comes in handy not having so many excess ends to deal to with!!!!
ReplyDelete