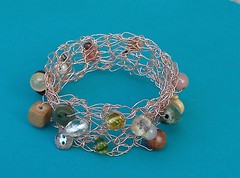
Want to see just how easy it is to make one of these crochet bracelets?
As always, if you would like to see the photos in greater detail... click on them... and you will be able to enlarge them using flickr

Firstly you will need an old hook. Once it has been used to crochet wire with, it will never be quite the same again. I am using a 3.0mm hook, but the exact size is not critical.

This is the copper wire I reclaimed from the electrical cable (click here for the blog post detailing how I did this) It is a bit thicker than the crafting wire I used in the earlier projects. If you are looking to buy wire, I recommend a 28 gauge... it is pliable enough to work with, yet strong enough to resist breaking too easily. My original bracelet was crocheted using 28 gauge wire and a 2.0mm hook
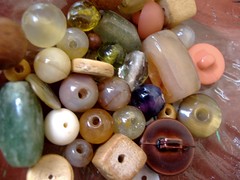
Gather a variety of recycled beads and buttons... or whatever you plan to embellish with
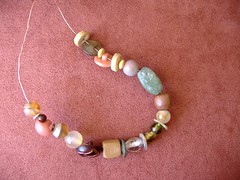
Before starting to crochet, you will need to thread these items on to your wire. Always thread on more than you think you will need. If you are using recycled wire you will need beads with large enough holes to easily pass over the kinks in your wire.
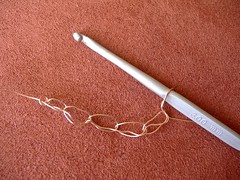
Work a few chain stitches... the width you would like the bracelet to be.

Make sure you keep your stitches LOOSE, as the wire has no 'give'
Work a single crochet into the second chain from the hook, then into every chain until the end. Try to ignore the fact that it looks ridiculous! It looks nothing like regular crochet - but that's okay... start working back and forth in sc, working a turning chain at the end of each row.
Do not panic if you think it 'looks wrong'... start chanting to yourself "embrace the squiggle... embrace the squiggle... embrace the squiggle"
Just keep going... it WILL be fine!
It can be really difficult to determine where EXACTLY your stitches are... don't worry about it... just poke that hook in wherever you can fit it, and try and keep your stitch count consistent. Seriously - it doesn't matter!
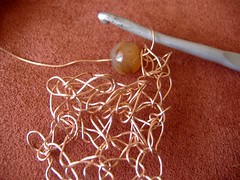
When you are ready to start adding beads, work a sc then slide a bead all the way up to your hook before working the next sc. Do this as many times as you like in the row.
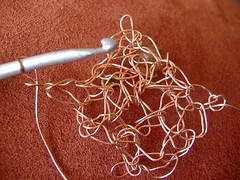
You'll notice that all the beads are settling to the BACK of your work.
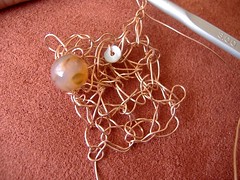
Then when you turn for the next row... you will see them clearly.
ALWAYS ALTERNATE YOUR ROWS... a bead row is always followed by a plain sc row
REMEMBER if the beads are facing you, you are working a NON-BEAD row
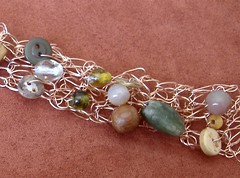
Work until you are happy with the length.
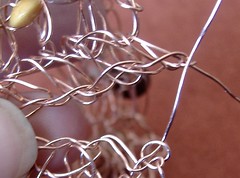
I have joined this one by 'sewing' the two ends together using the tails of wire. Obviously I am not actually using a needle, just poking the wire end though

To finish off I have threaded the wire through one of the beads on the bracelet, and then trimmed the wire
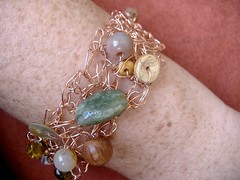
Next time I will share instructions for the knitted version!
21 comments:
What a great tutorial! I wish I'd had it around when I tried (my one and only time) crocheting with wire - I thought it looked awful so gave up. Now I know how to cope with it I may just give it another go.
THANK YOU!!!
Thank you so much for taking the time to post on the how to for the bracelet!! My friends will lke them so much. Thank you again!!
reillyclan11
it's sooo nice..ive never seen this before...i wish i could do that...but do not have the desire yet...
WOW! Thank you for sharing. This is so cool and I will definitely have to try it out. Thanks for taking your time to share this insight with us.
lovely!
campbellgirl - arghhh! what a shame... definitely try again, and ignore that little voice which tells you it looks awful
reillyclan - you're welcome :)
muzanoradawani - thanks
elitist society - simple yet fun, you have to love that!
tobey - thank you
I love the pictures you post -- they are so detailed and the ones of the finished projects are gorgeous. I don't have the time like I used to to knit and crochet, but I enjoy checking out your site. :)
gosh.. seriously i really really love that!! it looks easy but i bet it's not (i'm so not gifted with sewing or knitting or anything like it). but maybe i shall consider it for a shot this time because it's so cute!! again, i really admire your work. keep up the beautiful work! :DD
The photos and the instructions and the encouragement - woweeee! - such a winning combination (as usual from you) - much appreciated.
VERY cool! I'm excited about this one. I'll be linking.
hah
I've tried crocheting with wire and beads..but seeing your bracelet...gave me a whole new idea to try. I love your bracelet, it's just beautiful...Sure hope you don't mind if I add you to my list of really cool blogs..
meryl's musings - thanks so much... perhaps one day you will find the time again :) these bracelets take less than an hour to make!
ellymelly - give it a go sweetie... you might surprise yourself
karen - always nice to hear from you
rachel - thanks... link me any time :)
cc - would love you to list me... and I hope you give the wire another shot, too
this is fabulous. i can't wait to try it!
micha - have fun with it... it's a very different medium to work with
thank you for clarifying that you need to alternate a beaded row and a plain row i was wondering how to get all the beads on one side, i frogged like 3 times
I did it! :D
You can see it on my blog:
http://camaseiz.blogspot.it/2012/07/braccialetto-alluncinetto.html
Thank you!
İt's a great idea to use copper wire from electric cables.. What a creativity.. Thanks for the inspirations..
How do you keep the end of the wire from scratching or coming free and undoing the whole bracelet?
Florence...
The wire will not unravel. It will want to hold its shape. In fact, it will be quite a challenge to unravel it - even if you need to!
With the ends, just weave them in and out through your work, and push the final tip inside one of the beads. It will be very secure - and with the end inside of a bead, you won't be scratched.
Have fun with it.
Post a Comment