Showing posts with label storage. Show all posts

Thursday, June 19, 2014

Getting Organised..

I used to have a craft room.

My very own craft room.

The space was all mine - and I didn't have to share it with anyone.

All my goodies were in the same room - and I knew where to find things...

MOST of the time.

Supplies...


Then...

Along came baby number four - and we needed the space for a nursery.

Bye-bye crafting paradise. Hello Baby!

Since then, I've been in a jumbled mess with my supplies.

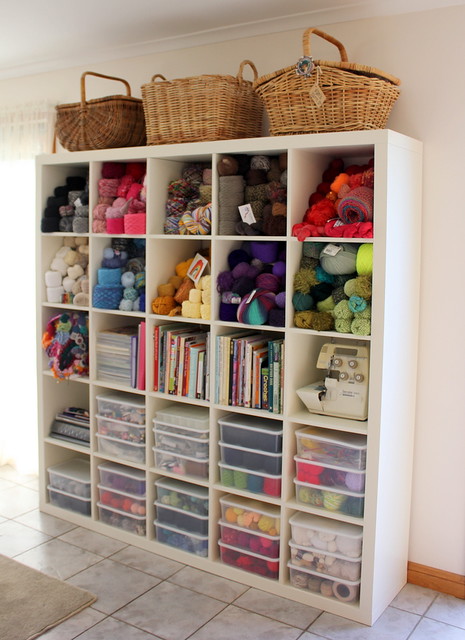
But I've found a new way to store them... it's in the middle of our Family Room... which is not ideal - but it's neat, organised and most of all INSPIRING...

Now if only I had another three of these shelving units!

And my own room.

supplies


Thursday, August 9, 2012

Thinking.

Storage

Yesterdays post made me stop and think. I didn't realise just how much I HATE my current storage system (or lack thereof). My yarn and my recycling are such a huge part of my life - and I want to love every aspect of it. There's no reason not to. So I need to find the love again...

In my thinkings... or is that thunkings? I realised something.

I do NOT hate it all.

In fact there's aspects of it which I quite like.

Love even.

Sure. Maybe they've needed a bit of a tidy up (just like everything else around here) but that's easy enough to do. Just don't tell Mr Goldfish I said that, or he'll want me tidying all that other stuff as well.

B-o-r-i-n-g!

So.

Here's one of the things I love: My Notion Jars

Storage

An entire shelf of my Kitchen Buffet is dedicated to my Notion Jars. I guess that I shouldn't really call it a Kitchen Buffet any more. It hasn't been that for a while. It does sit alongside our Kitchen Table (or is that a craft table??? one can never be too sure around here) but it's more Arts and Crafts than anything else. It's home to boxes of wrapping papers and cards, as well as old photos. Lots of coloured pencils, textas, crayons (for the kiddies, of course - if you can believe that) and underneath is some open shelving for Little Miss Charlotte. You see, she used to open my cupboards and pull out everything from inside - so I removed the doors, and put her toys in there instead! I love the Buffet set up the way it is. The kids colouring things are all at eye level, and so appealingly set out, that it inspires them (and sometimes me) to want to sit down and draw - LOVE it.

Storage

Oh.

I was supposed to be talking about my Notion Jars, wasn't I?

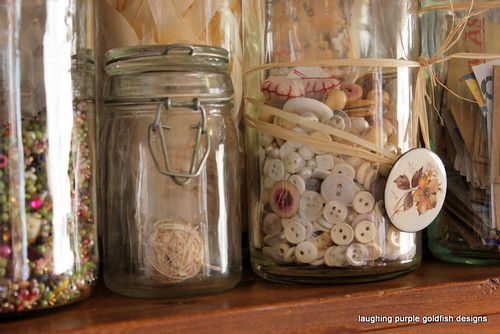
So. Basically there's a big long shelf, with lots of glass jars.

Storage

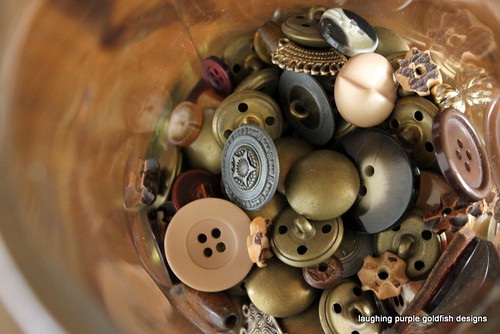
Mostly OPEN jars. Which works really, really well. They're kind of colour sorted. For example green beads and green buttons and any other cool green things that I find lying around go into the "Green Jar". Okay. I know you didn't really need me to spell it out quite like that for you. You get the picture.

Storage

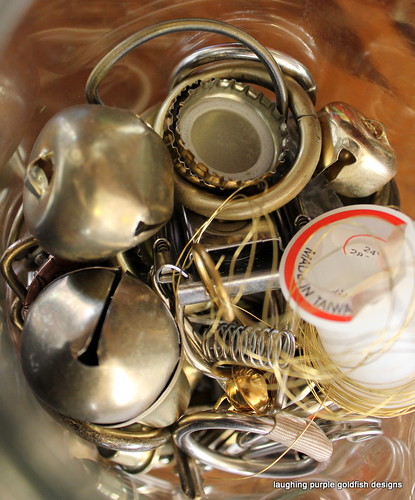
There's a jar of postage stamps. A jar of plastic lids and rings. A jar of wooden pegs. A jar of labels for  when I finally get myself organised and start selling some of my creations. There's even a jar or two of beads just for the kids. My favourite jar is the one with metal stuff. It houses old keys and springs, screws and D rings, washers and bells. Things which make noise when you clang them together.

Storage

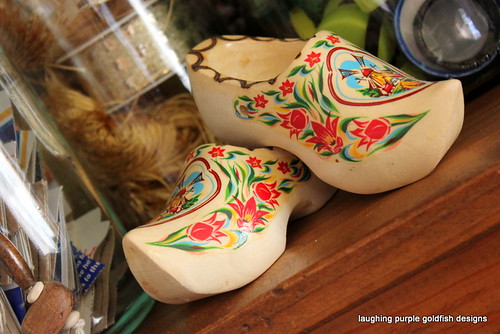
And the clogs are still there. Have you been following my blog since the Clog Days? I still haven't found a project to use them in - but they don't taunt me about it. They just sit there looking lovely! I'd miss them if they were to go... I love playing with them, and so does Little Miss Charlotte.

Storage

Back to the jars again.

They're good - I love them - They work - They stay

Didi I mention that it is really easy to put things away when you have OPEN storage? If I find a button or a screw or whatever, I just breeze past the buffet and POP it into the jar.

So. What else do I love?

I'll have to get back to you on that!

Storage

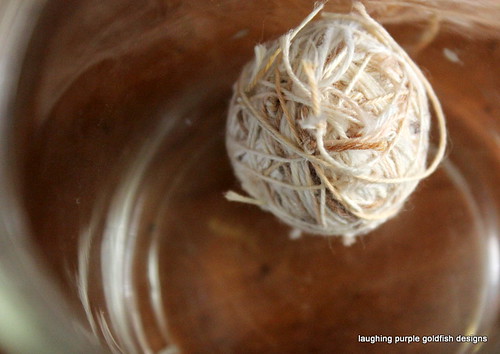
PS. Did you notice that my String Collection has it's own jar, too?

Wednesday, August 8, 2012

Storage

stash flash - feb 2009


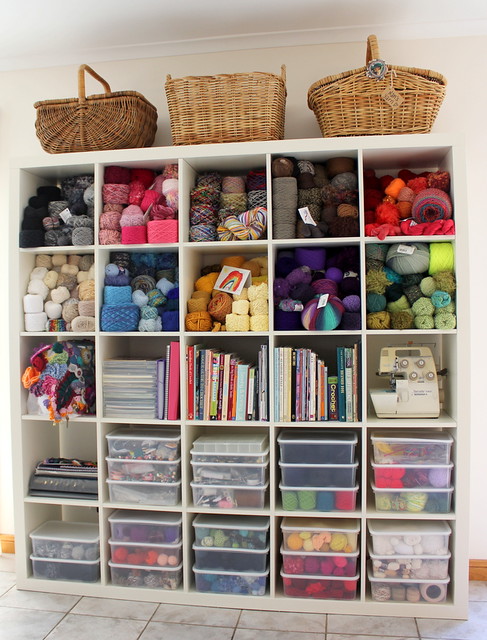
I love this photo.

It's a shot of my stash, taken back in February 2009 - I blogged about it here

Everything was so neat and tidy, and easy to access. I could see what I had at a very brief glance. It was easy to put things away - and I was always motivated to put them away, because it all looked SO PRETTY...

WELL.

Sadly,  it doesn't look like that anymore.

In fact - it makes me a little sad and wistful for the Good Ol' Days when I look at this photo...

Because I'm having a big UGH with my craft storage at the moment...


Too much stuff.

Too much mess.

Not enough order.

Too fiddly to get to.

Not inspiring.

In general - UGH!

So what happened to change that Beautiful Wall O' Yarn?

Well, for starters - I lost my craft room - it became a bedroom for Little Miss Charlotte. That was kind of the beginning of the end... We moved all my goodies to the main living area downstairs, but then MICE attacked my open storage of yarn!!! So everything had to go into large plastic tubs which could be sealed tight. Practical but ugly. And not at all inspiring.

Plus I've accumulated too much stuff again. Nothing fancy or particularly valuable, just a big stockpile of garments and manchester to recycle. More than I will ever get to in a lifetime.

It's time for a cull, and a re-structure...

Deep breaths - and off I go!

Wednesday, February 4, 2009

stash flash

I love my yarn stash,

and I especially love my stash storage...

it's just so damn 'touchable' all the time!

I can see and reach EVERYTHING (although admittedly, I do need a small stepping stool to reach the top shelf)

I originally wrote about my method of stash storage in this post here
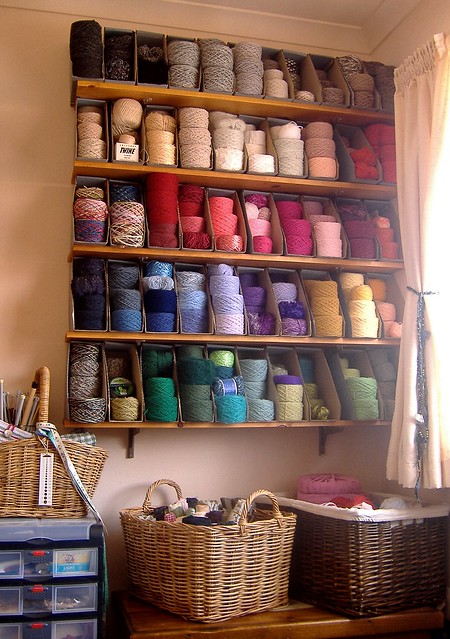
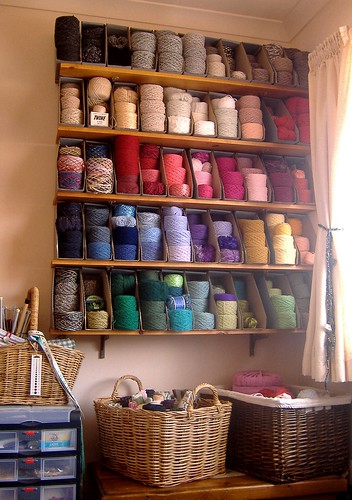
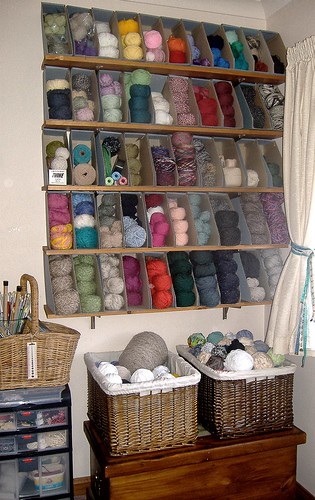
... well that was six months ago now, and it is still working beautifully. Originally I had organised the yarns according to fibre type. But then I realised that I don't really care too much about fibre types... I'm way more interested in colour. So now everything is colour grouped into what my sister refers to as my 'rainbow wall'

And it's easy to find inspiration when you have a rainbow wall!

stash flash - feb 2009

Wednesday, September 10, 2008

true confessions

I'm always a little bit cagey when anyone asks me how many unfinished objects (UFOs) I have lying around. The truth of the matter is... I don't know. Which is a bit silly really... to have projects just waiting to be finished off. So much time has already been invested in them, that it seems crazy not to complete them.

And I honestly believe that it takes a huge psychological toll on a person. Knowing that you have such a huge backlog can be daunting. It's too easy to push the projects aside, trying to pretend they don't exist. But then they just eat at you from the inside, and you end up feeling disheartened.

So it's time for me to 'fess up'... not just to you... but also to myself! Because I have been in denial about this for a while now, and I honestly don't know how extensive the UFO problem is.

Here is my everything!

wip cases

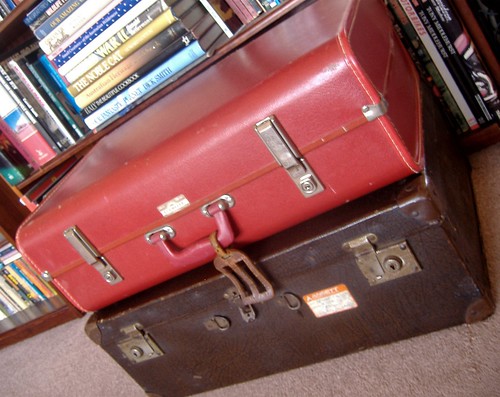
Okay, so I know there's not much to see here. I have very cleverly hidden them away inside these suitcases... out of sight, out of mind... not good.

I need to prepare myself for this. Tomorrow I will open the first case.

It's time to seriously sort and assess. I need to be ruthless. I just need to look closely at each project and ask myself one key question... frog (rip it, rip it) or finish???

Wednesday, August 27, 2008

winding yarn

I've always imagined that it would be so much fun to own my own ball winder... to be able to make those adorable little perfect yarn cakes. But I was astounded at the cost. I decided to do a bit of research first to make sure I chose wisely before purchasing.

In the meantime, I learned a very simple technique for winding a centre-pull ball of yarn... and it cost me nothing. I'm not going to be buying a ball winder now! I have no need for one... I am totally happy with this method.

All you need is a cardboard tube and your own two hands!

The perfect size tube is the inner roll from toilet paper. Now I have learned that there are two different types of people in this world... there are those who happily recycle these cardboard tubes for any purpose... and there are those who see them as germ-infested breeding grounds, which must be disposed of immediately!!!

These photos are a tiny bit blurry... because it's actually quite difficult to photograph yourself while your hands are busy winding yarn...

1

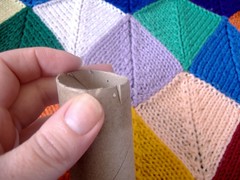
I have taken the tube from inside a roll of baking paper, and will need to cut it down to about one third of the size. So it is about the size of a toilet roll!
2

Make a small snip in the end of the tube.
3

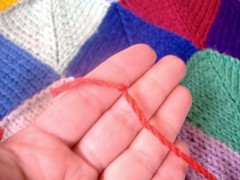
Tie the start of your yarn in a knot.
4

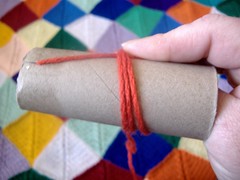
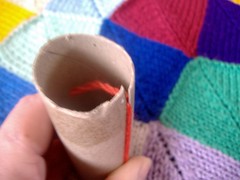
Slip the knot inside the snip you made at the end of the tube.
5

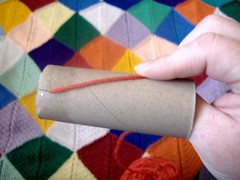
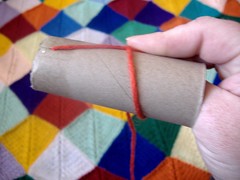
Slide your thumb inside the tube, and hold the yarn in place with your finger as shown.
6

Begin winding your yarn.

7

Wind it three times around the tube. See the way the yarn runs diagonally across the tube? Look carefully... it is moving up and to the left. This is intentional.
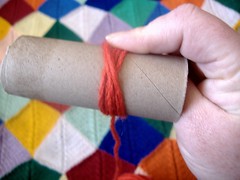
8

Tug gently on the yarn, and let the tube rotate a little on your thumb. Allow it to make about 1/4 turn, and then wind diagonally three more times.
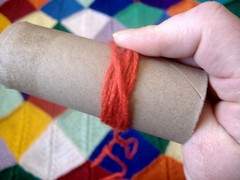
9

Again tug gently on the yarn, and let the tube rotate a little on your thumb. Allow it to make about 1/4 turn, and then wind diagonally three more times.

10

Keep going... wind, wind, wind, tug... wind, wind, wind, tug... wind, wind, wind, tug... I find it easier to hold the yarn still in my left hand, and wind the tube around the yarn. Probably sounds crazy... but that's what works for me!
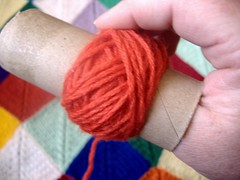
11

See the way I am always moving the yarn diagonally across the ball...

12

Continue in this manner until done. Once you develop your own technique, you will find that the tube moves easily in your hand, and you no longer consciously turn it. It feels a bit awkward at first... but persist with it until you work out a rhythm... it really is easy!
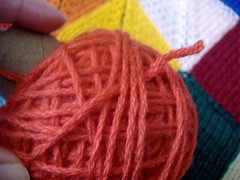
13

Tuck the end of your yarn under a couple of strands to secure (but not hide) it.
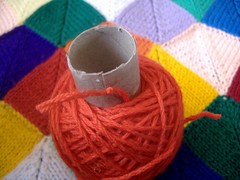
14

Free the knot from the snip at the end of the tube.

15

Carefully slide the ball from the cardboard.
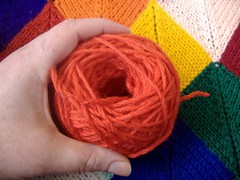
16

17

Squish the sides of the ball to ease the tension on your yarn.
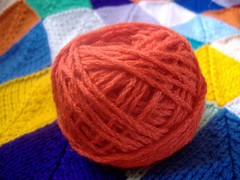
18

Ta-da! Tuck the centre yarn end inside the ball. Leave the knot there... it will make the centre end easy to locate when you are ready to use the ball.
Monday, August 18, 2008

spring cleaning!

Apologies to those of you who are anxiously waiting for me to finish the lining tutorial I started in my last post... I got a little side-tracked.

Admittedly, I get distracted far too easily. Not ideal, but it always makes life interesting!

Want to know what happened?

Well... I brought out my sewing machine to work on the lining. It was then that I remembered that I had broken the needle the last time I had used it. So I went to my sewing box for a replacement one... NONE THERE!!!!

I knew they had to be around somewhere. I very clearly remember that I had bought a five-pack not long ago, and had only used one out of it. I can clearly recall staring at the rows and rows of needles at the store... trying to decide which ones I was going to need. And then the excitement when I brought them home and they were the right ones!

Obviously I was so excited by the prospect of having purchased correctly... that I was in an ecstatic haze... and didn't put the needles away in the correct spot when I was finished. I mean, I can't think of any other reason for not putting them away properly... Surely not sheer laziness??? or distraction???

So... the needles had to be somewhere. I pulled the place apart looking for them, and then had a giant mess to clean up! Somewhere along the way I decided it would just make so much more sense if I completely re-organised my craft area... and I ended up doing a big spring clean (yes, I know I'm a few weeks early)

august 2008 - boxes

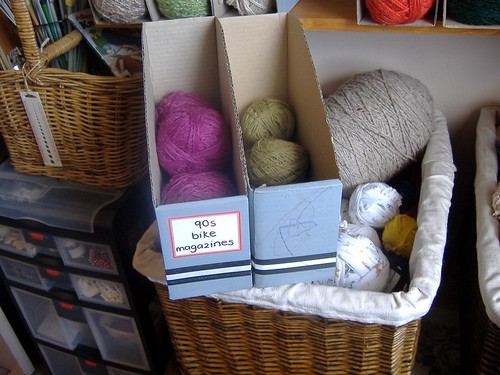
Remember these magazine holders you used to be able to buy? Still can I guess. Well these ones have been lying around at our place for years. I have wanted to throw them out on so many occasions... and Mr Goldfish has insisted on holding onto them... JUST IN CASE THEY COME IN HANDY ONE DAY!

more august yarn

Well, guess what... they did come in handy... but I would never have anticipated that I would store yarn in them. I laid them on their backs, and adjusted the shelving to fit perfectly. They work brilliantly! I've used plastic boxes for storage in the past... with reasonable success. But I want to be able to touch it... pet it... fiddle with it... just be able to see and grab exactly what I want when I want (did I hear someone whisper the words 'instant gratification'?)

So that's part of the job done. Yarn neatly on shelves. the baskets underneath are full of rag balls, and the chest at the very bottom contains felted jumpers. The small trolley is full of recycled bits and bobs... belts, jewellery, tassels, lace, pompoms... all sorts of treasures. And the basket on top of that holds my knitting needles and looms, crochet hooks, circular needles, etc.

And it you're looking for my measuring tapes... they're being used to tie back the curtains... of course!

PS. that stash of yarn is all reclaimed/recycled!

PPS. I didn't ever find those sewing machine needles either