There... I said it
I know that the idea of blocking goes completely against the casual and low fuss approach which I usually take towards my crafting... but let me share a secret with you... it works!
I certainly don't block every project... but there are some which benefit greatly from it...
So what is this 'blocking' all about then?
It is simply a method of shaping your finished piece... so that it sits nicely.
Think about the clothing in your wardrobe for a moment. Some garments MUST be ironed, some DON'T require any ironing... and then there are those which you can't really be bothered ironing, and sometimes you try and get away without bothering... but they really look and fit MUCH BETTER if you do.
Know what I mean?
Blocking is the same.
Some pieces do not require blocking... some do... and it's entirely up to you whether you do it or not! There are no blocking police.
But be aware that blocking can really improve the appearance of your work.
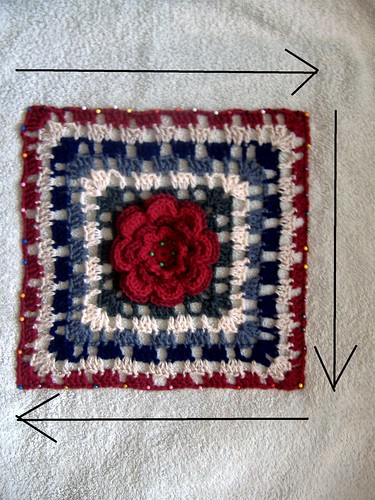
Look at this square I recently completed:
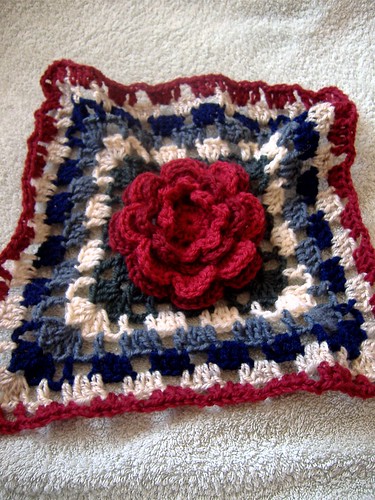
See how the centre looks fine, but then by the time you get to the outer edges it's all wavy and wobbly and messy???
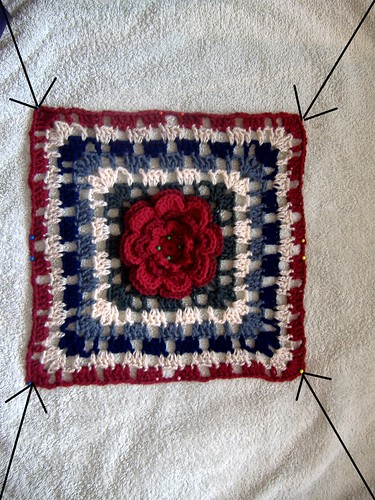
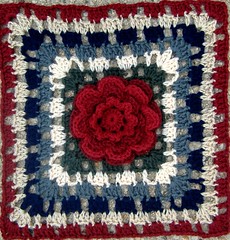
Well, I blocked it - and now it looks like this:

Better?
Certainly benefited from blocking, didn't it?
You don't need anything fancy for blocking. Sure, you can purchase specifically designed blocking boards or wires and pins, etc... but you know I like to keep it basic - right?
Very basic - pin it... wet it... dry it
that's all... three simple steps
I used
- a couple of old towels
- a tape measure/ruler
- lots of regular sewing pins
- a spray bottle of water (or just the spray jet on my iron)
- one of Mr Goldfish's hankys, clean of course!
- steam iron
Then placed the square on top, and pinned securely in the centre. I like to use four pins so that it is well secured, and I push the pins right into the thickness of the towels.
I wanted my square to be 30cm square. So I measured 15cm out from the centre to each side, stretching a little where necessary, and pinned it in place. I used two pins at each side, just so there wasn't too much tension on any one pin.
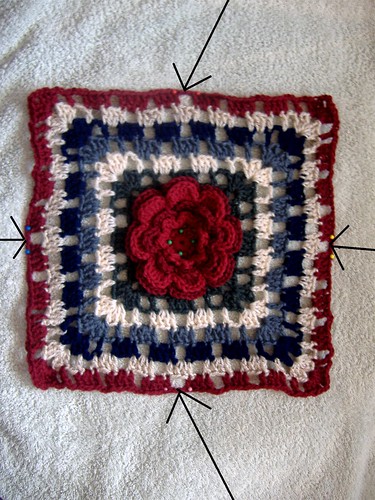
Then I moved on to the corners... checking the length was correct and pinning in place.
After that it was just a matter of pinning all along the edges, all the way around the square... ensuring things were straight. I use a lot of pins - perhaps more than necessary - but it works for me.
The next part is easy. I sprayed the piece with water, just damp... don't need to saturate... put an old hanky over the top... and lightly ironed it (wool setting, gentle pressure)
Then left it undisturbed to cool down and dry completely. Removed the pins... VOILA!
No matter what the fibre type, the basic steps remain the same
- pin
- wet
- dry
If you are using acrylic... the recommendation is not to use heat... but I sometimes do (just very gently and very carefully, you don't want to flatten the life out of it)
If you are unsure... there is no need to use heat at all!
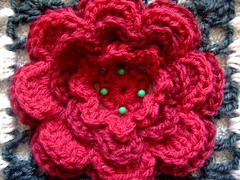
Also avoid pressing textured pieces... for example... I did NOT press the flower at the centre of this square.
Be bold and BLOCK! The results may surprise you...
10 comments:
ha! and I was thinking that you just crocheted perfectly beautifully square squares and I must stink at it because mine are wobbly lol
I guess I shall have to try this blocking!
THANK YOU! Once again you've simplified something that terrified me.
My one previous attempt at blocking involved heat, pressure AND acrylic yarn. As predicted, the squares had the life flattened out of them.
thank you sooooooooo much! very helpful. just one more question: washing. for things not like granny squares (for instance all of the many scarves i most recently made), should i wash them before wearing/gifting?
Thanks for the great tips. I've always wondered what all the blocking fuss was about but i had absolutely no idea!
Excellent! I've been putting off blocking, because it sounded a lot of effort, and I have some squares in desperate need.
I shall apply myself.
Thanks for the tip to do the middle of each edge before the corners. That seems like a good idea :-)
I like your linky widget too :-)
anabelle- looks like my secret is out... I do NOT crochet perfect squares! lol
tess - alas... there is no saving the acrylic after that point!
little mary - washing is a good idea... in my opinion, it helps the stitches 'settle' nicely... but the reality is, that I can't always be bothered doing it
curlypops - you're welcome :)
sam - definitely give it a go... and isn't the link widget fun... it reminds me of old posts that even I have forgotten about!
Hi
I have been an ardent fan of your site for a few months now and nothing ever feels right if I dont stop by your site at least once a day...
Just have an appeal. I have made one of your crochet bags, thanks to your easy to understand tutorial and was wondering if the same method can be used to make a backpack with a flap. I have yet to try it but I thought it might be better if I check in with you first.
Was thinking of making a cute cream pink one for my niece.
Appreciate the reply.
Thanks
jini - absolutely yes! a back pack would be very possible... and I love to hear that people are experimenting with my designs... just work the basic bag to the dimensions you would like, and then add the flap and handles... perfect... look forward to hearing how you go with it :)
I also find that just getting a square wet under the sink, shaping it, and letting it dry in front of the fireplace works too!
loved your blog... all the works are fabulous... lots of things to learn as a begginer
Post a Comment