Wednesday, December 4, 2013

Edited Wrap

Onarum Wrap

I'm fiddling about with my Onarum Wrap pattern - making a couple of changes based on the excellent feedback from my pattern testers last month.

Really pleased with the alterations. Just need to stitch the tassels in place, and block it lightly - the take photos of the new version.

I'm working with a different colourway of the Bendigo Murano this time - and it's just as delightful as the last one!

Speaking of delightful - I've been blown away by all the magnificent wraps created by my testers this month... and now I need to choose a winner. This one is going to be tough!

Onarum Wrap

Tuesday, December 3, 2013

More Stars...

Recycled Christmas Stars

I've been experimenting with more of those Recycled Plastic Christmas Stars...

Recycled Christmas Stars

This time I'm using bread bags.

The plastic has been spun to give the plarn some some twist - which gives better stitch definition.

Recycled Christmas Stars

The print on the bread bags makes for a more colourful decoration..

But I still prefer the simplicity of the plain white ones which I showed you yesterday.

Recycled Christmas Stars


Monday, December 2, 2013

Recycled Christmas Stars

Recycled Christmas

I'm loving these RECYCLED Christmas Stars... and I just know I'll be making a squillion of them this Christmas Season.

Especially since all you need to make them is a plastic shopping bag and a tea bag string, plus a pair of scissors and a crochet hook.

Oh - and an iron and a couple of sheets of baking paper or brown paper bags.

Recycled Christmas

So firstly, I cut the bags into plarn - which is plastic yarn - just one continuous length of plarn about 2.5 cm (1 inch) wide.

Then I crocheted the plastic into the stars using this pattern here. It's in German - but don't be deterred by that! There's a simple chart, and since there are only two rounds of crochet needed, the chart is very simple and easy to follow.

One thing I did different from the pattern: I didn't begin with a magic ring. I thought that tightening the ring would overstretch the plastic tail and BREAK it. So instead I worked a ch-4 loop at the beginning.

Recycled Christmas

Because the stars were a bit soft and tended to curl in on themselves, I decided to iron them flat. Nothing fancy - I just popped the stars between two sheets of baking paper and held the iron over them until they started to melt a little. The iron was just on it's usual setting, which I think is the cotton one - not the highest setting, but one down from there.

Then I sat them flat while they cooled. 

The ironing process shrank the stars a little, and fused them. The plastic actually melted and the stitches stuck together. it created a thinner but stronger star - more suitable for hanging on the tree.

If you look closely at the photo above, you'll be able to see where the plastic has fused - especially around the centre hole.

Once they were cooled, I just threaded a tea bag string through one of the holes near the tip - and knotted the end to form a loop.

I'm thinking these will look brilliant on our tree this year!

Recycled Christmas

Friday, November 29, 2013

More Unicorns.

Unicorns

These unicorns are fiddly but fun to make...

Unicorns

I thought that my sewing technique might improve with each one, and the process would become less awkward - but it hasn't yet...

Maybe I need to be more patient.

Unicorns

One thing I am noticing, is that these fabric toys don't seem to develop a personality of their own in the same way that the knitted and crochet ones do...

Not sure why that is.

It might just be because I'm concentrating so hard on getting it all put together just right, that I'm not allowing the toy to take on a life of it's own.

Or maybe I'm just over thinking things... Sometimes I do that!

Unicorns

And here they are as a family:

Unicorns

Thursday, November 28, 2013

Unicorn.

Unicorn

Way back in June, I posted about receiving bags and bags of crafting goodies from my friend Leah. Mostly it was fabrics, the bulk of which were upholstery samples...

Unicorn

I knew that I wanted to make some adorable toys from them - and finally I have the first one ready to show you...

A precious unicorn!

Unicorn

Wednesday, November 27, 2013

Updated Sock Monkey Hat

Alterations to Crochet Sock Monkey Hat

Do you ever have projects that you're just not happy with?

Even though you've done everything "right" according to the pattern... there's something about it which leaves you cold?

I'm sure you must have had this happen - I can't be the only one, can I?

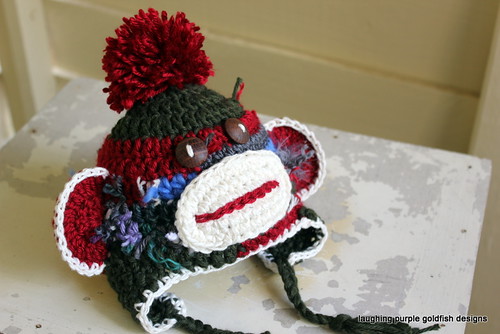
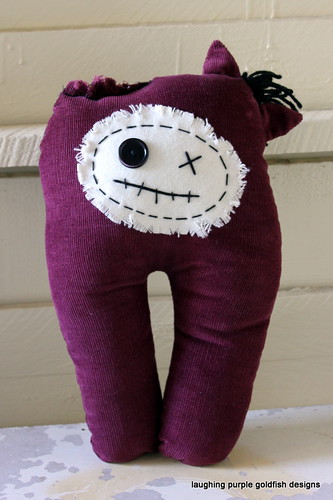
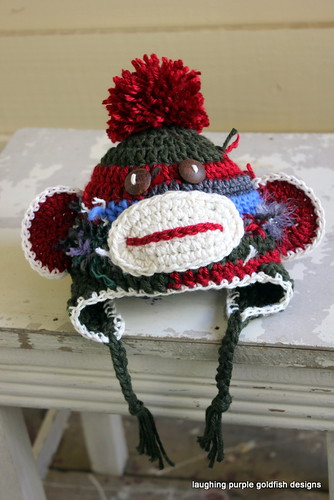
Remember the Crochet Sock Monkey Hat from last week?

Something wasn't right about it...

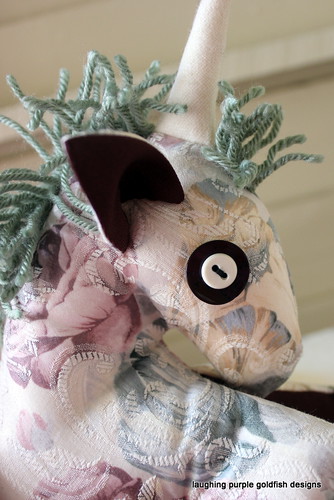
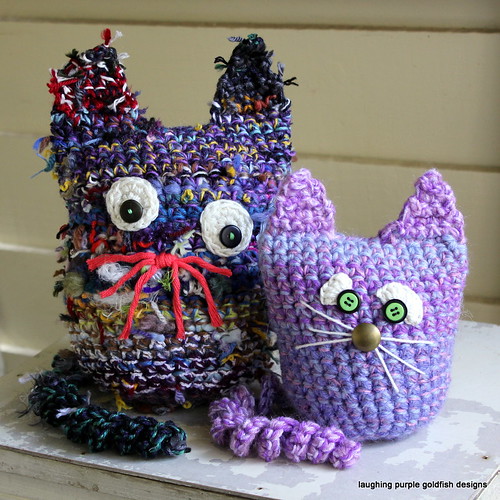
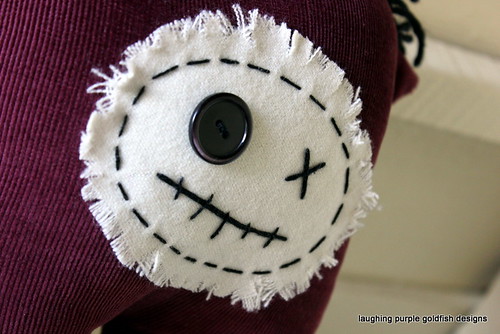
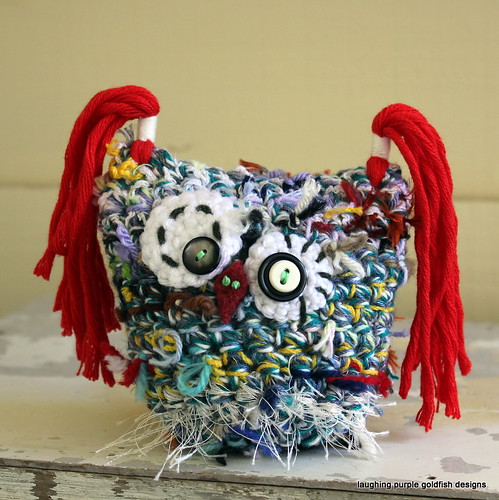
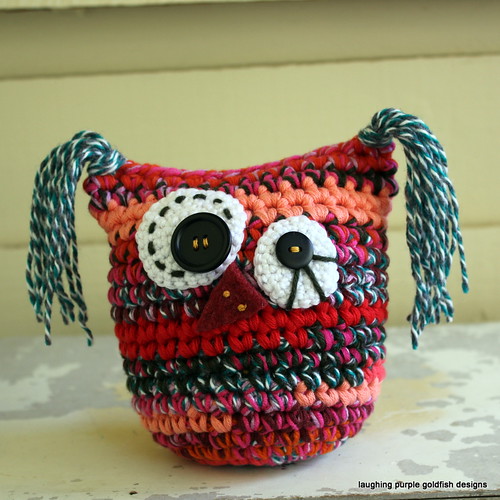
Mostly it was the eyes. I knew that they were too dark on the face, and didn't POP enough....

But I had tried a whole bunch of different buttons, including a variety of light ones - and none of them made me happy. The wooden ones I ended up using were the best of a bad bunch!

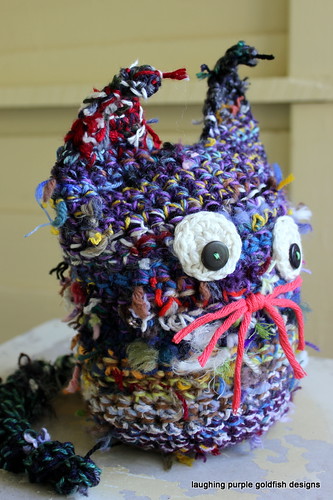
I tried adding a cream crochet circle behind the eyes, to give them some lift - but they were a disaster. They made him look like some freakish kind of alien monkey (not that there's anything wrong with that - it just wasn't the look I was going for).

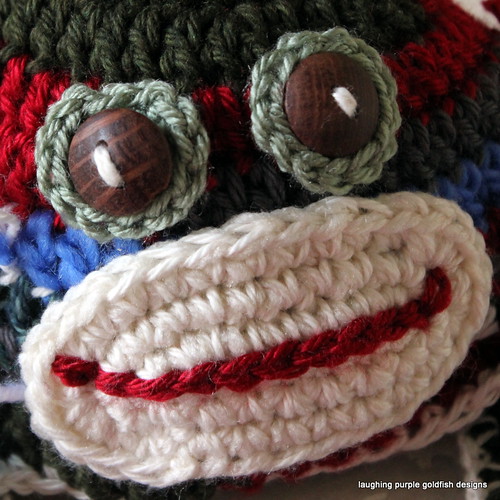
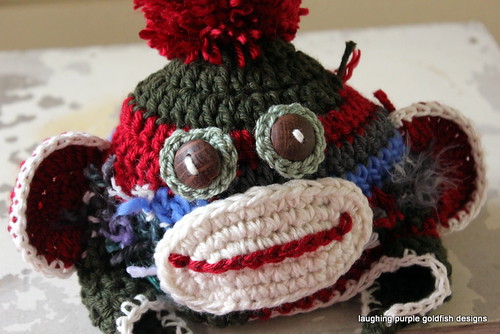
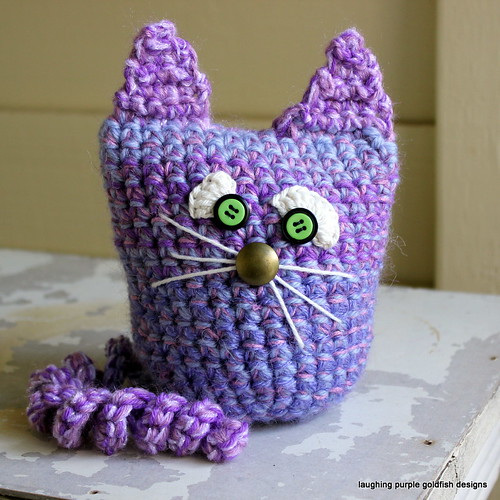
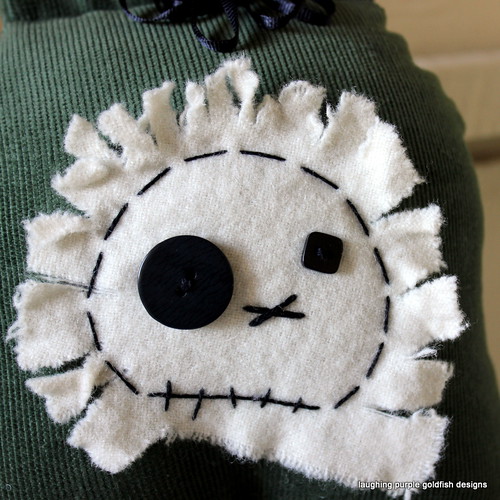
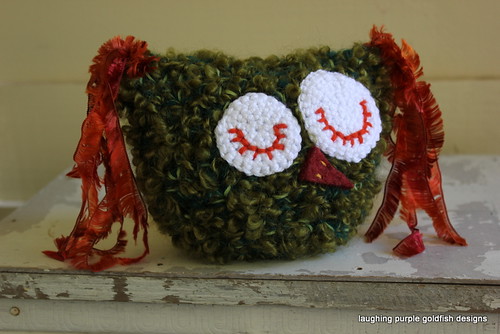
So I sat with it for a while... and ended up going back to those crochet circles, but this time I made them in a really light gum leaf green colour. That way they weren't so stark against the face, and it set them apart from the muzzle.

I'm much happier with them now!

And thanks to Loren's suggestion, I've also added an extra stitch at each end of the mouth, to turn it up slightly into a smile.

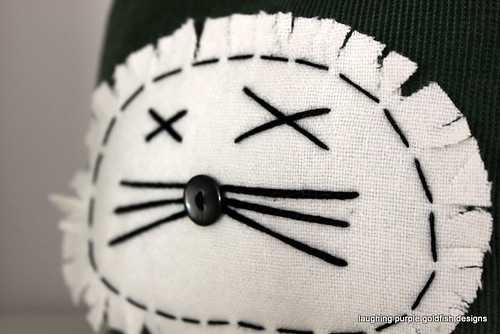
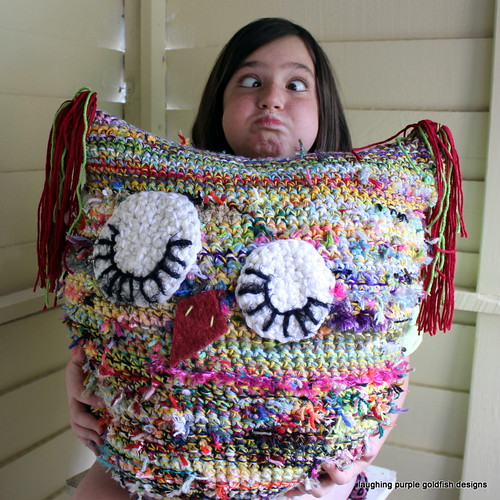
Here's how the face looked before:

Sock Monkey Hat

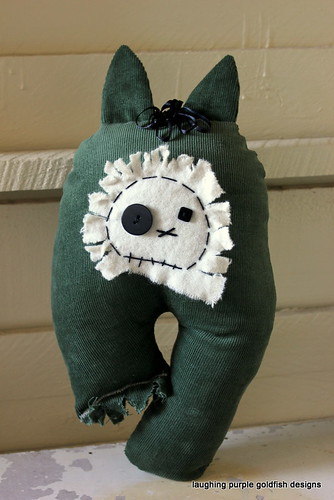
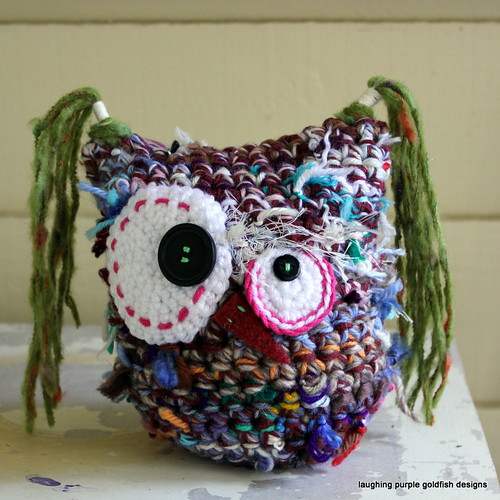
And how he looks now:

Alterations to Crochet Sock Monkey Hat

Not a HUGE difference, but I find him much more lovable!

Tuesday, November 26, 2013

Arnotts Embroidery

Cross Stitch Embroidery

This is one of my ongoing Works In Progress... If you've ever attempted cross stitch embroidery, then you'll understand the amount of time which goes into a project. Hours and hours and hours of work will result in one small section being completed.

It's one of those odd hobbies, which requires a huge amount of concentration but is actually quite mindless.

I say that it's mindless, because it doesn't really require much by way of decision making. You work from a chart which marks every single stitch and tells you which colours to use where. You don't choose the colours, the stitches or the image - it's all done for you.

I guess that the concentration part comes in to play when you have to put all those little stitches in the right place! Because one wrong stitch can really mess you up. Especially if you don't realise at the time...

Cross Stitch Embroidery

It's also kind of hard on the eyes to work on black cloth. I've learned that the hard way... although if you cover your lap with a white pillowcase while you work, then the white can be seen through the holes in the cloth, making it easier to identify where each stitch needs to go. I wish I had discovered that tip at the beginning of the project.

My goal has been to finish this project before the end of 2013...

I've been working at it for about seven hours each week, for the last six months!

Here's a progress shot of where I was up to the last time I shared this with you, back in May...

Arnott's Embroidery

And here's where it stands now.

Cross Stitch Embroidery

So although it feels like a never ending task - you can see I am getting there!

SLOWLY.

Monday, November 25, 2013

Meow

Cats

Look at how much my Little Angel has grown up!

She's nearing two and a half years old now - and please don't ask me where the time has gone to, because I honestly don't know.

Cats

Little Miss Charlie is mad about cats. Stark raving mad about them. Can't get enough of them. Unless one moves toward her - and then she's terrified...

She loves to imitate a cat, too. Will crawl around on the floor meowing loudly. Tries to lick herself clean.

I have to keep the cat food well away from her. She loves to eat it! All my kids have had a fondness for eating cat food. The dry biscuits, that is - not the tinned fishy stuff...
                                                                                     

Cats

One day last week, she ate her breakfast naked... from a bowl on the ground outside... meowing just like a cat.

I can picture her in therapy in about 30 years time, explaining to her counselor that her mother forced her to eat outside like an animal!

Oh well.

The other kids are sure to be in therapy anyway - so why should she miss out?

Cats

As for these little cats...

Well - I got tired of making owls.

(Shocking but true)

But I had a bunch of bodies already hooked up. So I've added some quick ears and a curlicue tail. Made the eyes a little different, and added a nose with whiskers instead...

Meow!

Cats

Friday, November 22, 2013

Dead Heads

Deadheads

I don't really know what they are...

Deadheads

Or what they're meant to be...


Deadheads

But they are DEAD.


And they have HEADS... 

Deadheads

So I'm calling them DEAD HEADS!


And they're loads of fun to make...

Deadheads

Thursday, November 21, 2013

Soap Sacks - Not Pretty, but Practical

Soap Sacks

Not everything you make needs to be pretty...

Sometimes it just needs to be practical!

These soap sacks are simple to make, and incredibly PRACTICAL.

Especially in the kids shower.

I'm not sure that my children really use soap much. In fact, most of the time it just lies on the base of the shower - slowly disappearing down the drain...

But these sacks are a novelty. They love how the soap lathers up for them, and hanging the soap means it doesn't get soggy and lonesome at the bottom of the shower.

As I said - they're not fancy.

But they're damn good at their job!

Soap Sacks

The pattern is Soap Sacks by Vicki Mikulak and is available as a FREE download.

It's supposed to use a 10 ply (worsted weight) cotton, but I actually used an 8 ply (DK) for mine.

I find they are the perfect size for the standard supermarket sized bar of soap. While there is some stretch to the crochet mesh, I would enlarge the pattern if you were wanting to use them for a fancier handmade soap.

Wednesday, November 20, 2013

Scrappy Sock Monkey Hat

Sock Monkey Hat

I don't use patterns much these days. Usually I just plan what I want to make and start hooking. Sometimes it works - and sometimes not... but I like it that way!


On the rare occasions when I do use a pattern, I tend to start out with good intentions to follow it all the way through - but somewhere along the way I get all distracted, and end up doing my own thing.

The other day I was trying to help someone out with a pattern they were struggling with, and it seemed that the easiest way would be to grab my yarn and hook, and test the pattern out for myself.

To be honest, I don't love this one. There's nothing wrong with the pattern itself, it's just my project which is leaving me a little cold. I think it's the eyes. They don't POP as much as I'd like them to. In fact, they kind of get lost in the scrappyness of the hat.

Maybe it's just that I don't have an adorable model to pose wearing the hat for some photos. This hat is a size 0 - 3 months... and my Little One is almost two and a half years old. I did try it though. Just in caes it MIGHT have fitted her! 

Not. Even. Close.

Anyways... the pattern is from Sarah Zimmerman at Repeat Crafter Me. It's called the Crochet Sock Monkey Hat and is written for all sizes, from newborn to adult.

Sock Monkey Hat

Tuesday, November 19, 2013

Gargantuan Owl

More Owls...

I know there's been so many owls already - but this one is a little different than the others...

More Owls...

Mostly because of the size - this one is GARGANTUAN!

More Owls...

Basically, I followed the same pattern as for Calypso the Kooky Owl - but I continued the base increases until I had 90 sc. Then I worked 43 rounds with no shaping.

I haven't taken his measurements, but you can tell at a glance - this guy is larger than your average owl! 

More Owls...

And much as I love the Gargantuan Owl - I still have a soft spot for the smallest owl in the family. The Mini Owl wins my heart every single time. It's just too cute for words:

More Owls...

And here's a few of the other owls finished over the weekend...

More Owls...

More Owls...

More Owls...


Monday, November 18, 2013

PLEASE can I have this one Mummy?

Mermaid


Little Miss Katie actually swooned when she laid eyes on this finished mermaid...

Maybe it was the blonde hair (well, yellow gingham really) or the pink highlights... the pink bikini... or that perfect curlicue tail. Whatever it was - it was LOVE at first sight!

Of course she begged me to let her keep it - and I had to be the mean Mum who said no.

So we agreed instead, that one day I would make one to her exact request... and in the meantime I taught her to make curlicues herself - which took her mind off the heartache for a little while, at least!

Mermaid