Showing posts with label lining. Show all posts

Friday, July 27, 2012

A Fiddly Lining

The Hakelbeutel is an unusual shape of bag, which means that I can't do my regular  of lining.

See how the base looks?

Hakelbeutel

I'm pretty sure this is the reason that the bag ended up in Hibernation to begin with.

The thought of trying to line it had me tearing my hair out - so the bag was sent to the Naughty Corner for a while (which is where that Male Centaur is at the moment, just in case you were wondering). And after about six months in the Naughty Corner, it was packed away for good!

So.

Here's my Plan of Attack.

I'm going to line the bag using the same construction process as the actual bag uses.

So I've made four rectangles - their measurements are one square wide and four squares long, plus seam allowances. And I'm putting them together just like the bag was done.

Here's some photos for anyone else contemplating the process... Like you Loren!

Hakelbeutel

Hakelbeutel

Hakelbeutel

Hakelbeutel

So far, so good!

I just need to turn down some seams along the top edge, and fit the lining into the bag.

EDITED TO ADD:

I have run into one little hiccup.

In making the lining, I have assumed that all the squares were the same size...

They're NOT!

When I felted the bag, not all sides felted evenly. So my lining fits beautifully for about 80% of the bag, but sits too small across one section. I'm having a fiddle to see how I can get around this.

Wish me luck...


Wednesday, July 25, 2012

Time for some sewing...

Hakelbeutel Bag

Had a bit of a sort through the fabric stash today and chose the lining material for My Hakelbeutel. As you can see it's an off white fabric with a black floral print.
I don't like to be all matchy-matchy with my linings, so I like the idea of a simple black and white.

Hakelbeutel Bag

This remnant came from my Grandma Maria (my Mother-In-Law)
Maria is a professional dressmaker, thought it's years and years since she's worked in the industry... A couple of years back when she moved house (after 40 plus years in the same place), she had a HUGE fabric de-stash - and this is one of many remnants which came to live with me!

Rag Bag
 
While I have the sewing machine and the fabric out, I'm going to line another bag...

This Rag Bag was stashed away in the same UFO box (that's Un Finished Object box) as the Hakelbeutel. It dates back a few years, too. I remember making it on a Crochet Weekend back in 2010, I blogged about the weekend but I don't think I mentioned this bag...

It's made from rag strips which are about 1cm (1/2 inch) wide and I think I used about a 7.0mm hook. I followed the Easy Peasy Crochet Bag pattern, and added a buttonhole handle...
All that left to do is the lining, and maybe an embellishment.

Rag Bag

And I'm thinking that depending on the amount of material left over - 
it will become a top or a dress for either Katie (age 8) or Charlotte (age 1)

But for the moment, the fabric is drying... 
and I'm working on the secret handles... 
which may or may not be successful... 

we'll both have to wait and see on that one!


Monday, September 1, 2008

all fixed

My Lisa Gentry Yarn Bag is finally complete...

Lining has been re-stitched, without the firm base this time. The heart embellishment had been repositioned a little lower on the bag.


28

29

Sunday, August 31, 2008

on to the lining

Have to be honest here. I haven't actually lined a bag with a circular base before... so I am going to cross my fingers and hope for the best!

I figure I will need a circle shape for the base, and a rectangle to go around the sides... and then somehow join the two together...

3

So when I was crocheting the bag, I used the circular base as a template for cutting the fabric. Just look at that beautifully ironed fabric, would you?

4

I left a small seam allowance around the edges.

19

Here is my rectangle. It is a little taller than the bag, and twice as wide (plus a seam allowance)
Once again, it is beautifully ironed! Sorry mum

20

21

Hmmm. Can you see those pins down the left hand side there? I'm going to seam down that side to make a tube.

22

I've attached the circular base to the tube with pins.

23

And then sewn it in place.

24

Top edge has been folded down and I have finally IRONED the lining. Here it is pinned in place ready to hand stitch.

25 yuk

Uh-oh! YUK

Big problem here... that base I put in is horrendous! This photo doesn't quite depict how bad it is. Believe me... it is appalling!

It was supposed to help to give the bag some shape... a nicer shape... NOT A WORSE ONE.

The problem seems to be that it makes the bag so wide at the base, that the sides have to pull in too steeply. Which makes it look really weird and angular. Also, I had made the handles longer than the pattern called for, so that I could carry it over my shoulder... but then the base makes the bag stick out so far from your body that if feels ridiculous!!!!

My verdict? The idea of the base is great, and the technique works beautifully... but the base was inappropriate for this particular bag.

Time to remove the lining and the base... then stitch the lining back in again...

I'm taking a few deep breaths here... this task calls for patience...

click here to see the completed bag


Saturday, August 30, 2008

the base

Working some more today on the Lisa Gentry Yarn Bag.

Firstly... I knew that I wanted to stiffen the base, so the bag would sit nicely and keep its shape. I'll need something plastic, just in case the bag ever gets wet.

9

I found this plastic piece which was the base of an old laundry bag. It's quite thick, but still flexible... so it should do the trick beautifully.

10

First I cut out a circle the same size as the base of the bag. It is a bit of a rough circle... but as long as there are no sharp corners, it will be fine.

11

Now I add some holes. If you are squeamish... close your eyes! It is not a refined process. I am literally stabbing holes into the plastic, using a metal skewer.

12

I need holes so that I can actually attach the base to the bag. Twelve holes are plenty.

13

I've popped the base in... ready for stitching.

14

15

Using one of the yarns from the bag and a wool needle, I am sewing right through the plastic and the crochet bag

16

17

I'm stitching over a few crocheted threads and then going back into the bag and through the same hole in the plastic again.

18

I don't need to worry about the mess on the inside... this will be covered by the lining. Mind you, I do like to ensure my starting and finishing knots are on the underside of the plastic.

Ready for the lining now... click here for details

Friday, August 15, 2008

simple lining tutorial

You must line your bags...

Seriously.

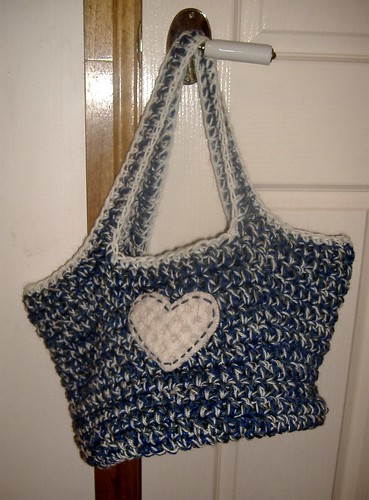
Even if it is only a very simple lining (like mine) You have put all that wonderful creative energy into crafting the outside of the bag... it really would be a shame not to finish the job. The bag will look better... feel better... and be so much more practical... if it has been lined.

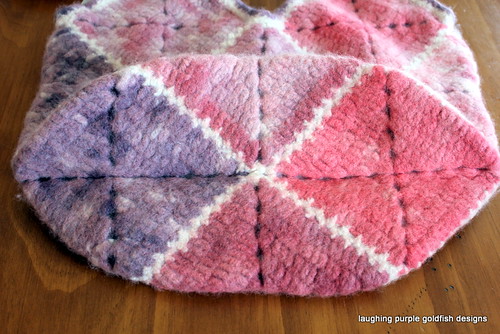
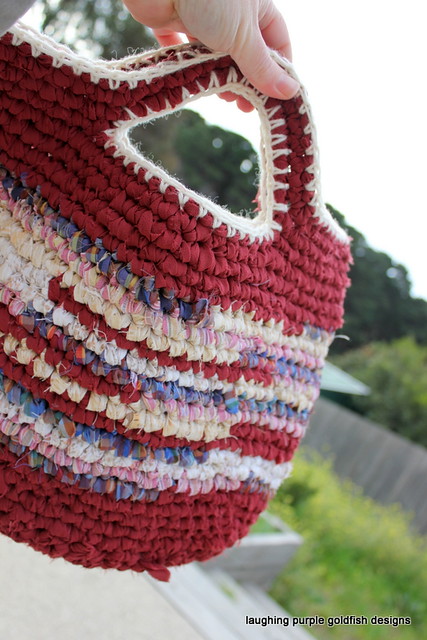
Click here to see the pattern for the easy peasy crochet bag.

Here's the thing. I am NOT particularly skilled at sewing. In fact, that's quite the understatement! Sewing is just not one of those tasks I have enjoyed enough to learn how to do properly. I'm always so impatient with it.

So if I can line my bags... so can you!

I choose to make the lining by machine, and then attach it to the bag by hand. I you don't have access to a machine you could work the entire lining by hand. There's not much sewing required.

I will step you through my easy peasy process. I'm sure there are fancier techniques around, but I NEED SIMPLE for this. Here we go...

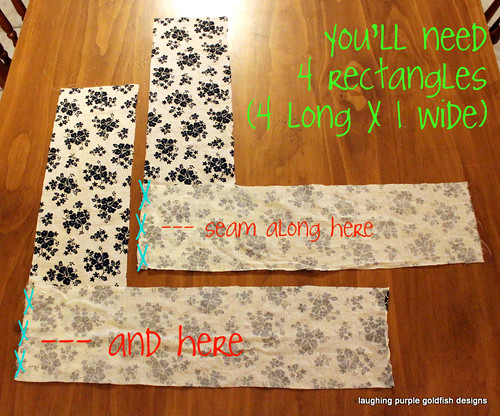
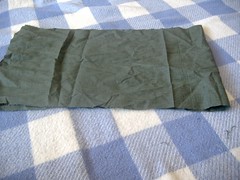
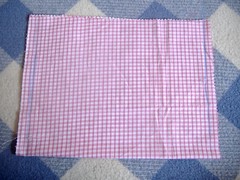
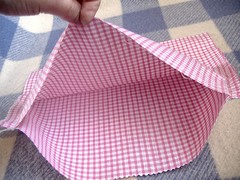
Fold your lining fabric in half, and lie the bag on top. The bottom of the bag should lie along the fold of the fabric.

34

Trim the fabric to size... allowing approximately 1cm excess on each side, and a couple of cms excess across the top of the bag.

(If you want to get all 'fancy pants' and add a pocket... which I am NOT doing here... now is the time!)

32

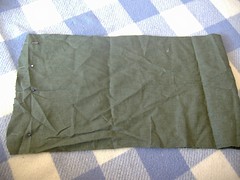
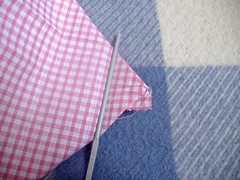
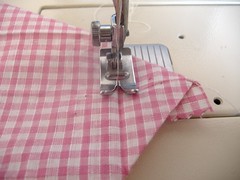
Mark two straight lines on the fabric, indicating the widest point of the bag.

43

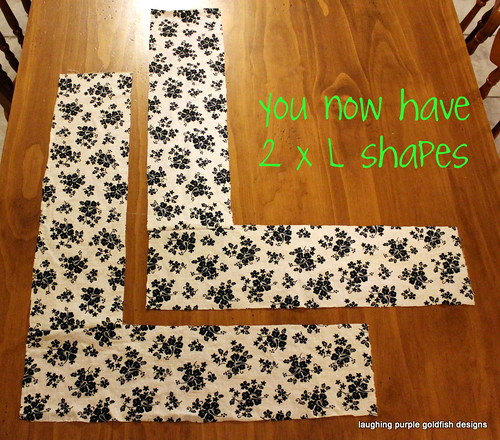
Then seam along these lines. You now have a 2D bag. The next step is to give it some depth.

44

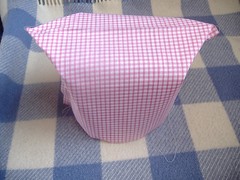
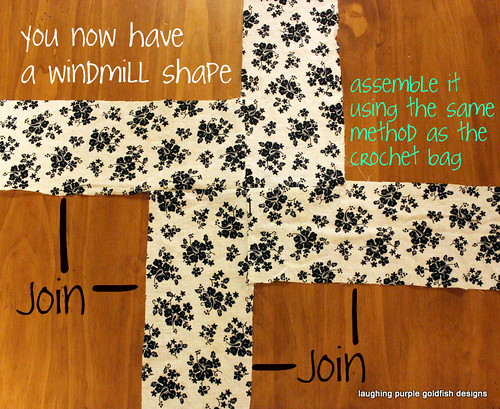
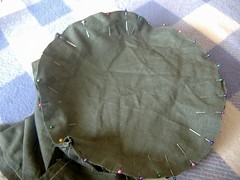
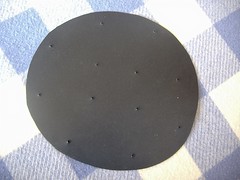
Turn the lining upside down, and stand it up (like a hat) See those points which stick out at the top?

45

Fold them in towards the centre. They should look like two small triangles pointing to one another. Can you see that we are creating a 'rectangular' shaped base?

46

Aim to make this 'rectangle' the same dimension as the base of your bag. Place the lining inside the bag to check the fit.

47

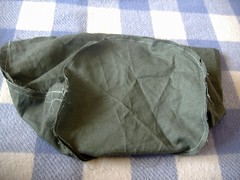
Once you are happy with the fit, remove the lining and iron a fold along the four sides of the base... and a fold running from each corner of the base upwards. Sounds complicated, but it's not. You are just ironing the lining into a 3D shape.

48

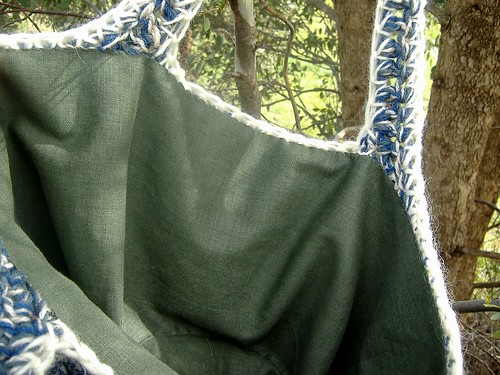
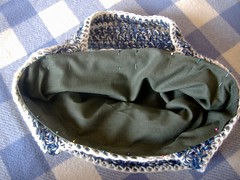
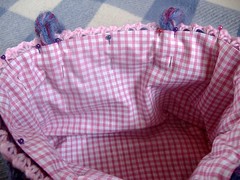
Try the lining inside the bag again. This time you need to fold down the top edge, so that it sits just inside the top of the crochet bag.

49

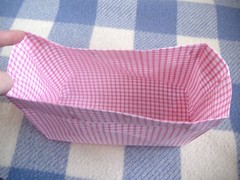
Remove lining and press this folded edge.

Is is starting to look like a lining yet??? It should be!

50

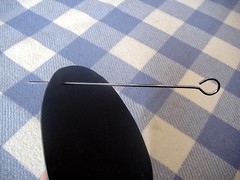
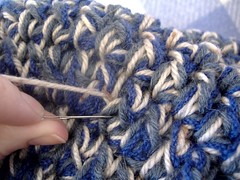
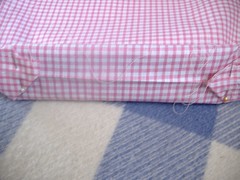
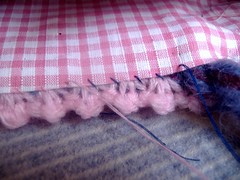
Go back to those triangles we folded at the base and remove the pins. We are going to sew along the fold (as indicated in the photo by the crochet hook)

51

like so...

52

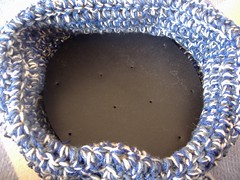
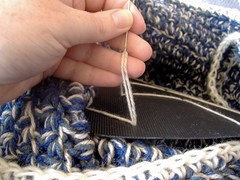
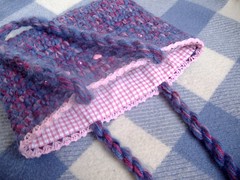
Place lining back inside the bag for the final time and pin into place. I find it easiest to pin the corners into place first, and then the sides.

54

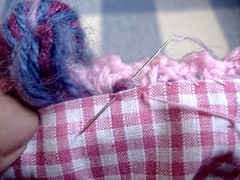
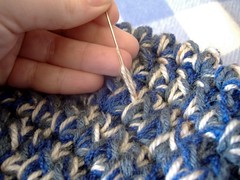
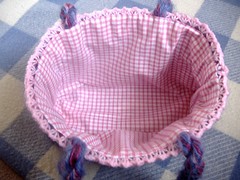
Hand stitch the lining into place... using an overstitch.

53

I've worked a few stitches here in a darker colour, to make it easier for you to see what I have done... Ideally you would use a matching colour to your bag.

55

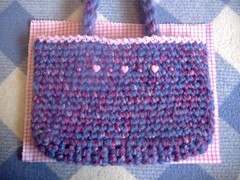
Once you have worked all the way around... you are finished!

56

Don't worry if it looks a little higgildy piggildy like mine does! It will settle with use.