Seriously.
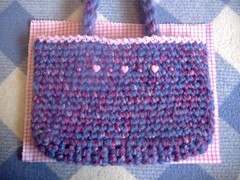
Even if it is only a very simple lining (like mine) You have put all that wonderful creative energy into crafting the outside of the bag... it really would be a shame not to finish the job. The bag will look better... feel better... and be so much more practical... if it has been lined.
Click here to see the pattern for the easy peasy crochet bag.
Here's the thing. I am NOT particularly skilled at sewing. In fact, that's quite the understatement! Sewing is just not one of those tasks I have enjoyed enough to learn how to do properly. I'm always so impatient with it.
So if I can line my bags... so can you!
I choose to make the lining by machine, and then attach it to the bag by hand. I you don't have access to a machine you could work the entire lining by hand. There's not much sewing required.
I will step you through my easy peasy process. I'm sure there are fancier techniques around, but I NEED SIMPLE for this. Here we go...
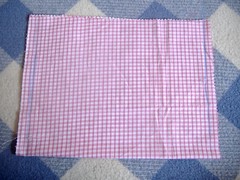
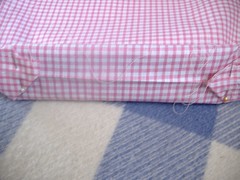
Fold your lining fabric in half, and lie the bag on top. The bottom of the bag should lie along the fold of the fabric.
Trim the fabric to size... allowing approximately 1cm excess on each side, and a couple of cms excess across the top of the bag.
(If you want to get all 'fancy pants' and add a pocket... which I am NOT doing here... now is the time!)
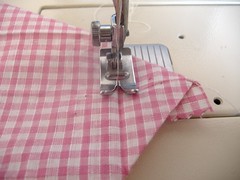
Mark two straight lines on the fabric, indicating the widest point of the bag.
Then seam along these lines. You now have a 2D bag. The next step is to give it some depth.
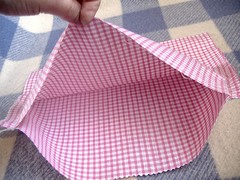
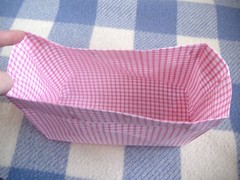
Turn the lining upside down, and stand it up (like a hat) See those points which stick out at the top?
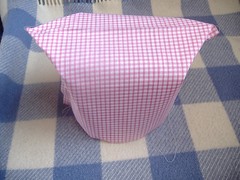
Fold them in towards the centre. They should look like two small triangles pointing to one another. Can you see that we are creating a 'rectangular' shaped base?

Aim to make this 'rectangle' the same dimension as the base of your bag. Place the lining inside the bag to check the fit.

Once you are happy with the fit, remove the lining and iron a fold along the four sides of the base... and a fold running from each corner of the base upwards. Sounds complicated, but it's not. You are just ironing the lining into a 3D shape.

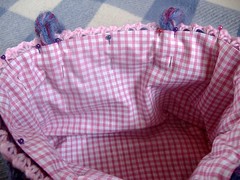
Try the lining inside the bag again. This time you need to fold down the top edge, so that it sits just inside the top of the crochet bag.
Remove lining and press this folded edge.
Is is starting to look like a lining yet??? It should be!
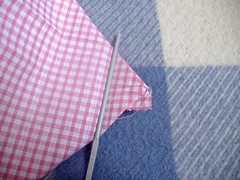
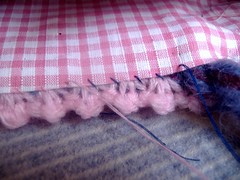
Go back to those triangles we folded at the base and remove the pins. We are going to sew along the fold (as indicated in the photo by the crochet hook)
like so...
Place lining back inside the bag for the final time and pin into place. I find it easiest to pin the corners into place first, and then the sides.
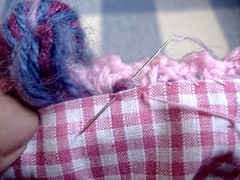
Hand stitch the lining into place... using an overstitch.
I've worked a few stitches here in a darker colour, to make it easier for you to see what I have done... Ideally you would use a matching colour to your bag.
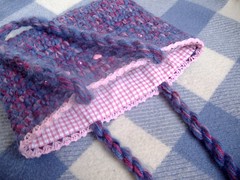
Once you have worked all the way around... you are finished!
Don't worry if it looks a little higgildy piggildy like mine does! It will settle with use.
42 comments:
Oh yes I'm hungry for more, I fit into your category of sewers. I see stramenda has bought a sewing machine and is looking for some advice.
Love your post's Cat.
My sewing machine is itching for this ! Thanks for taking the time to make this tute LaughpingPurple !! And since I'm a beginning sewer, I'm so glad its fairly simple :-)
lol... it will definitely be SIMPLE!
Wow! You have made all so clear, thank you so much.
I just LOVE the way you make the 3D base. Ingenious ! I'd never thought of doing it like that. Excellent !! Thank you so much for putting this tutorial up :-)
Sincerely
Cristina
www.stramenda.com
Great tutorial. Explained perfectly. Great photo's.
I can't wait to give it a go.
do let me know how you go with your own linings... they can be fiddly, but are well worth the effort
This was so well done!! I'm anxious to try this out now! :)
You make it seem so easy! I am just so terrible with a sewing machine - I usually sew the lining too narrow or too wide. I do agree that you MUST line your bags though. It finishes them so well.
thanks brownberry! glad to be able to help you out with something after all you have done for us over at the YEAR LONG GIFT-A-LONG
it is easy amy... although I do tend to make my linings a tiny bit on the big side myself! I just find that I have to work slowly and methodically with it... there's nothing difficult to it... you just need to work patiently
Thank you so much for taking the time to post such a thorough lesson! I'm going to post the link to your site on Crochetville. I know there are a lot of gals who will LOVE you for this!
~Shelle Cain
thanks for linking shelle... I hope everyone finds it to be a straight forward and useful technique
Wow! Thank you so much for the tutorial. You have given me the nerve to have a go at this myself.
yay dawn... be brave... you can do it!
thank you sooo much for all your photo help! I can't sew very well and this definately helps me. Now I can follow your tutorials and line all the bags I've made. You're wonderful!!!!
Thank you!!!!!!!!
have fun with it shelley... and just imagine how fabulous your bags will look when they have been properly finished off... lining really makes all the difference
Up until now I've liked the look of lined bags but haven't tried them myself, in fact I haven't done any bag because I didn't want to make a bag that I couldn't finish. Your tutorial is explained so well that I'm going to make a bag and line it! Thanks!!
muttix - so pleased to have given you the confidence to go ahead and try this... have fun with it
Any chance you can show us how to line a round bag??
mooney - are you meaning a bag with a circular base? take a look at this blog entry which might prove helpful http://laughingpurplegoldfish.blogspot.com/2008/08/on-to-lining.html
You do a fantastic job of taking pictures of each step.
freed - thanks... as they say... a picture tells a thousand words... I know I'm a visual learner, as are many other crafters
This is the best tutorial I've ever seen on lining a bag. Thank you for taking the time to make it!
I LOVE you! I DO!
hey! I LOVE this explanation... I was just wondering how you would do it if the bag has a messanger type flap... I made the bag up so there is no instructions on how to line it... any tips would be great! Thanks!
anonymous - I would make it just the same way, leaving one side much 'taller' than the other, so that it can become the lining for the flap... failing that... you could line the body of the bag as shown in this post above... and then stitch a separate rectangular piece on to line the flap
Just what I needed for two Christmas projects. Thanks for posting this lovely tutorial. Had written earlier yesterday from Ravelry. Did you get my message? Examiner article, your bags? Many thanks.
SWatterson
This is awesome! Thank you so much! I had tried another pattern, which essentially would have turn out the same...if I could understand what they wanted me to do! I have had a lot of positive feedback and requests for this bag! Thank you so much!
Thank you so much for this fantastic tutorial. It has helped me out a lot now I can line any size bag that I crochet/knit in the future. Thank you again!
I just wanted to say, I luv all your tutorials! The pictures and the way you explain everything is fantastic.!
Thank you so much for a precise and useful tutorial! i've just made the lining for my daughter's bag ... and I finished in 20 minutes!
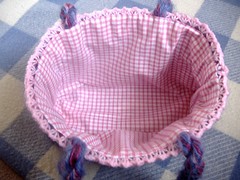
I love the way the last row of the bag is the same colour as the fabric inside it :) well done, looks great.
Might even be able to try that, need to get a sewing machine first.
thanks for this great tutorial - I just finished my first knit bag and the lining looks great!
Ah I freakin love you! Thanks for this tutorial!! You don't know how long I have been looking for this!! Thank you so much :)
i'm new to crochet and terrible at sewing (really I am). Anyway your tutorial is very thorough. I've just finished crocheting a tote bag and been looking for how to do a lining. Thanks for your great explanation.
WOW! Here sits a 65+ year old lady that ALL her life has never sewed a button on "right", much less make a lining for a purse!(always managed to get the button on the buttonhole side of things!)Your tut is wonderful and I even understand the wording!!
Thank you for taking the time to put together something that someone as dense as I would understand....lolol.(You do realize NOW I have now been put in a position of HAVING to make something that will "need" a lining?)
Thank you so much for this pattern! I have made a large tote and the small easy peasy bag!! Beautiful work and well written and so easy to understand, even for a beginner like me! Both of my bags turned out beautiful.
Crochet a beautiful and easy to love this pattern Thanks effort
Thank you so much! Your instructions are easy, clear and understandable for a person who DOES NOT sew, hates sewing and can't even thread a needle!
Thank you thank you thank you thank you! I'm an expert knitter and crocheter and totally ignorant about sewing because it's not exactly my favorite thing to do. Your lining tutorial is AWESOME and a person with rudimentary sewing skills can follow it and line a bag successfully. I'm living proof! I've blogged about it and linked my readers to your blog, including photos of my crocheted bags: http://myknitadventures.blogspot.com.es/2014/10/crocheted-rag-bags.html
Thank you for sharing with us. You make many lovely things.
Thank you for sharing with us. You make many lovely things.
Post a Comment