Showing posts with label felting. Show all posts

Wednesday, May 22, 2013

Wow!

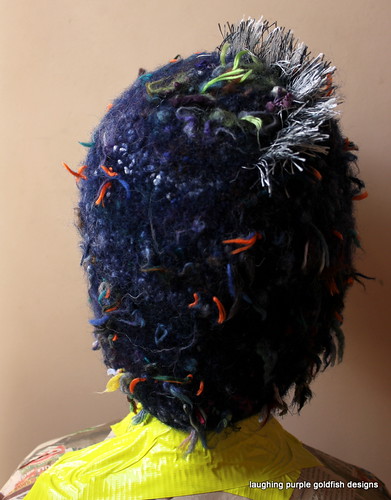
This doesn't look at all like I expected!

Felted Hat experiment


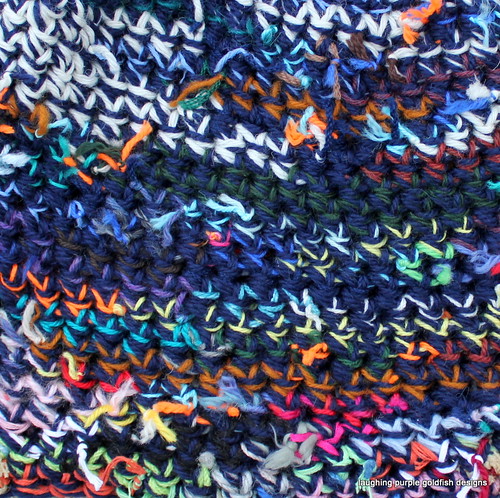
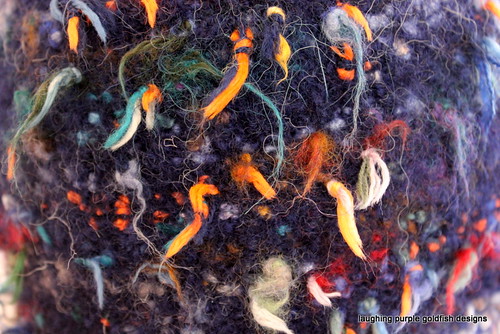
So basically, when the navy yarn felted... it pulled the non-felting yarns in tightly as well...

And left all those loose fly away knots.

Felted Hat experiment

I kind of like it.

Well... most of it!

I'm not too sure about this mohawk of eyelash yarn at the top.

It's a bit too QUIRKY for my liking.

Time to get out the hairdressing scissors, I think!


And if you're wondering about the fluorescent tape on the neck of my mannequin...

Well the beanie came out a little small, so I figured I could stretch it over the head.

I might have been a little rough.

Ah well. I can always add some more paper mache.

Tuesday, May 21, 2013

A Felting Experiment

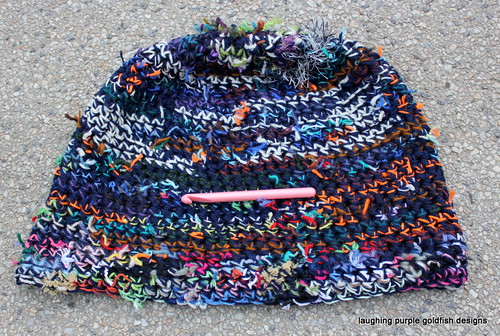
So I'm working on a felted beanie...

First time ever.

And I have NO IDEA how it will turn out.


In a way, every time you felt it's a bit of an experiment.

I mean - you never seem to know just quite how your yarn will react to the process.

It's sometimes even a complete mystery whether it will felt at all.

Of course, you could always felt a swatch piece...

But let's face it. I never do that. And I like to think that I'm in the majority on that one.

(Although I could be wrong).

Hats for Beanie Festival

And this time I'm trialling something a little different.

I'm using two yarns worked together: one strand is a navy feltable wool and the other one is my Crazy Yarn. The Crazy Yarn is made up of short leftover scraps all knotted together. I have no idea what fibre most of it is. In fact, it would be safe to say there's a little bit of everything in there. Some of it is definitely cotton, some is bamboo, some is acrylic. None of those fibres will felt.  So what will happen when they are put through the felting process with a 100% wool?

I have no idea.

But I'll do it anyway - Just for FUN!


I also have no idea if the beanie will fit a normal adult head after felting...

But it can always be a kids hat...

Or one for a GIANT.

Friday, August 3, 2012

Craft Fair

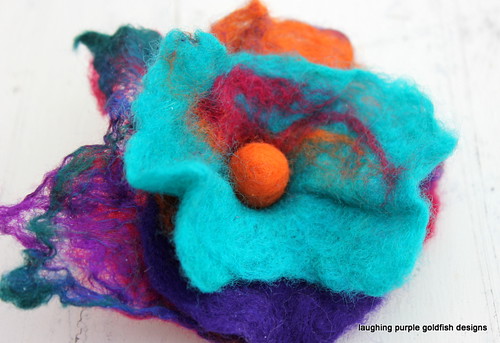
Felted Flower

Last Sunday I went along to the Melbourne Craft and Quilt Fair at the Exhibition Centre.

It's always fun to have company at these things... so I traveled in with some of the girls from work - Julie, Tam, Jo and Mary... and met up with my crochet buddy Annie once we were there.

There's always so much to see and do at these events. Although I'm not a quilter, I still like to look - and imagine that ONE DAY I might be!

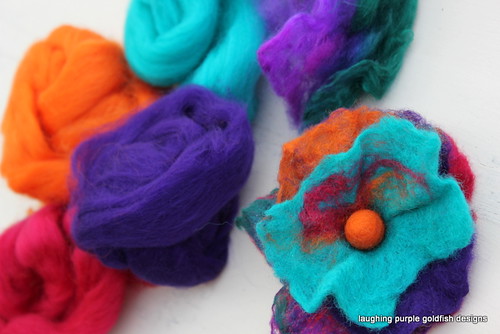
Annie and I took part in a felting workshop, where I made this gorgeous flower...

And chatted to the woman next to me about the Craft Cruise she has booked to travel on. How AWESOME would that be? A Craft Cruise! Have you ever been on one?

Felted Flower

One of the other COOL things about the Craft Fair was that I got to meet up with Prudence Mapstone (my freeform guru) and also see the Hang Ups Exhibition in person.

Remember the closet monster I made earlier this year for the coathanger exhibition? Well, he was on display at the Craft Fair... along with some VERY SPECTACULAR freeform pieces from around the globe. I tried to take photos to share with you, but with the indoor lighting they just didn't turn out at all well. So you'll just have to take my word for it -
They were EXQUISITE!

Tuesday, October 21, 2008

my first knitted project

My favourite pattern in the Ladybird Book was this 'handy bag'

pattern picture

... and this was the result

my bag

Guess what? I just realised that my obsession with making bags obviously started in my childhood!

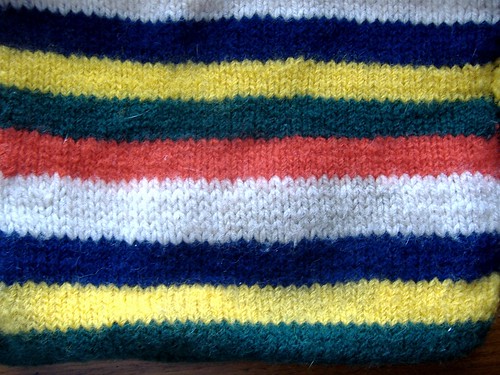
Over the years the bag has not been cared for very carefully and some felting has occurred. It's actually a very good example of how different colours of wool can felt unevenly.

Each of the colours used in this bag were the same brand and type of wool...

Each of the stripes were originally the same width...

stripes

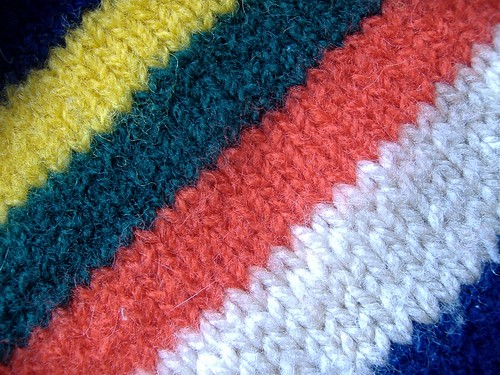
But, as you can see... the darker colours have felted better than the lighter ones... and the white has not felted at all. Apparently the chemical process involved in lightening the colour of the wool can affect the ability of the fibres to felt. Just something to keep in mind if you are ever working on a felted project using multiple colours... it's definitely worth felting a test swatch of each colour.

close up

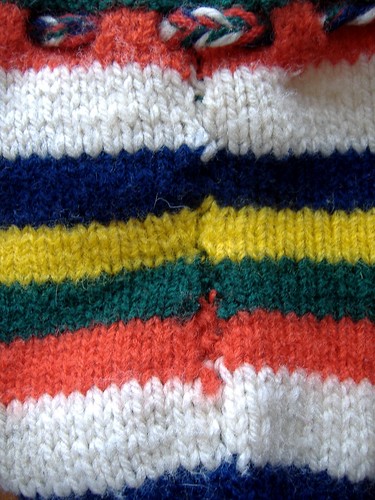
I'm pleased to announce that my seaming techniques have improved from the early days...

questionable seaming

I know that many knitters dislike seaming, but over the years I have learned to quite enjoy it. The 'finishing' of your work is so important... it really makes all the difference, so it is really worth learning to seam well. It seems a shame to put so much effort into the knitting, and then make a mess of the seaming.

Friday, July 11, 2008

felting and the tumble dryer

I've been giving a lot of thought to this idea.

What's the worst that can happen? I mean, when you are 'felting' you want the fabric to shrink, and the fibres to matt together. So what harm could the tumble dryer possibly cause to that process?

The only concern I really had was that it might somehow crumple the finished fabric. But I have an iron (don't tell Mr Goldfish, or he'll expect me to start using it on a regular basis) so I could smooth out any crumples.

Anyway. I decided to experiment.

I let one jumper sleeve air dry... tumble dried the other and compared the finished appearance. The sleeve which went through the dryer shrank a teensy bit more than the air dried one. Only the smallest amount. Like 1cm difference over the whole length of the arm. This difference will vary with each individual jumper, but it's not enough to worry about.

So the next jumper I felt will be dried in the tumble dryer. That way I can avoid the smell of wet wool in my house for days on end. Especially over winter. I'll keep you updated on my success (or lack thereof)

So here is a close up of the jumper before felting. It's the reverse side, and you can clearly see the ridges formed by each stitch.

4

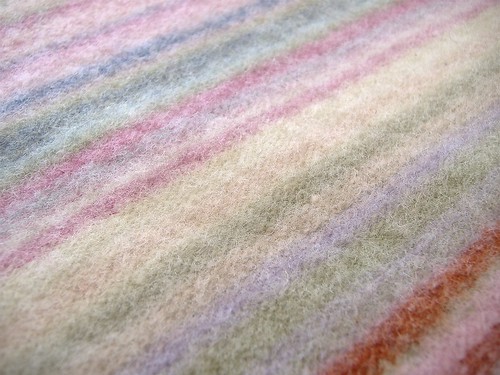
And afterwards, it look like this... you can only just make out those ridges.

feltingafter

Now to decide what to make with it...

Monday, July 7, 2008

felting stinks!

click here to learn the difference between felting and fulling

click here
if you would like to know how to select a garment for felting

I don't know why the smell continues to bother me. I should know to expect it by now... but it manages to take my breath away every time. That hot, wet wool smell... ugh!

Anyway, enough complaining. It's time to share some useful information about how I felt my jumpers. Remember the three elements required for successful felting... HEAT, MOISTURE and AGITATION... well, I like to add a fourth... SOAP

So essentially I am going to wash the garment in hot soapy water, and be as rough with it as I possibly can. Felting can be done by hand in a basin, but is very hard work for an item as large as a jumper. Using the washing machine is definitely the way to go.

First of all. Put your garment in a bag. It might fit into a lingerie wash bag. Or you could put it into an old pillowcase, fold the end over and use safety pins to close it securely. The idea is to protect your washing machine. There is usually a great deal of debris which comes from the jumper during the 'matting' process. You need to confine this matter in the bag... or you will clog the filters of your machine and destroy it!

Top loading washing machines are ideal for felting. They agitate well, and can be opened at regular intervals to check progress. But I don't have one of them!

I use a front loader. They are designed to be gentle on your clothes, but I don't want gentle. Gentle DOES NOT felt! So I add a pair of old gumboots and some old jeans to the cycle. These beat against the jumper, helping the fibres to matt together. Even if you are using a top loader, you should try adding items to 'bang around' inside. Some people use old towels or tennis balls. Whatever you put into the cycle will probably never be the same again... so choose wisely.

Add your detergent. Any soap is fine. Again, we are not looking for gentle or soft treatment.

Make the water HOT. I set my machine to 95C... which is the hottest setting. It works like a charm. But be warned. The colours often run, so I would avoid felting a light and a dark jumper in the same cycle. If I was felting a black and white patterned jumper, I would probably try setting the temperature lower so that the colours didn't bleed too much.

So. I have HEAT, MOISTURE, AGITATION and SOAP. I set my machine on a towel setting, which is the harshest option I have. One important thing to remember. DO NOT ALLOW THE GARMENT TO SPIN. The spinning process can stretch it into some crazy shapes, which cannot be recovered from. Make sure you remove the jumper before this happens. If you are using a top loader, and therefore have some control over the length of time spent spinning, you could probably allow it to spin for a minute.

Be prepared that when you remove the garment from the washing machine it will probably be dripping wet. Remember, it has not been spun dry. I wring it out in the sink and then roll it up in some old towels, put it on the laundry floor and stand on it to help absorb as much moisture as possible. Then I smooth it out as flat as possible, and leave it on some more old towels to dry. This may take a couple of days if it is a heavy knit. I've always wondered it I could use the tumble dryer at this stage, but never been quite game enough to try it.

felting dry

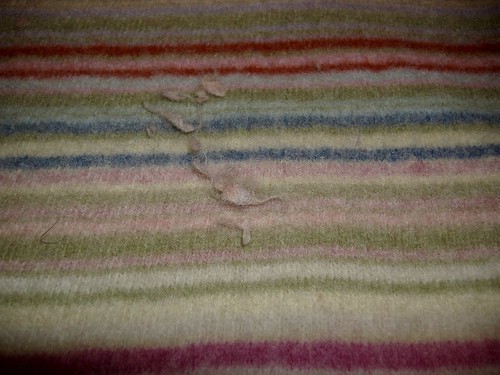
Some garments will shed more than others... this is an example of what you DON'T WANT clogging your filter

felting pills

EDITED TO ADD... I've since tried using the tumble dryer... with excellent results

click here to see before and after photos

Saturday, July 5, 2008

choosing and preparing the jumper

click here to skip ahead if you have chosen the jumper and are ready to begin felting

click here to learn the difference between felting and fulling

I've chosen this jumper from my frog pond... It is a fairly fine knit with small stitches. I would expect that when it felts it will not thicken up too much, and we will probably still see some stitch definition. I have chosen to felt rather than frog this jumper for two reasons. One is because the yarn looks quite fine. I find fine yarns quite difficult to frog. The second reason is all of those beautiful stripes. They look great in the finished item, but will mean lots and lots of joins in the yarn.

1

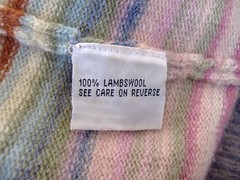
First of all, check the fibre content... 100% wool is fabulous. I have heard of people using as low a percentage as 80% wool and still getting good results, but haven't tried this myself.
2

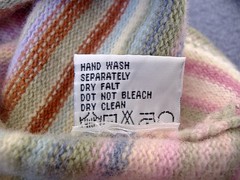
Also check the care instructions. Does it say hand wash? Or dry clean only? Excellent! Any garment which begs to be treated gently is going to HATE the workout we give it, and therefore felt beautifully. Be very wary if the garment care tag states that it can be machine washed. If so, the wool may have been chemically treated to prevent the fibres matting together... and it WILL NOT felt nicely for you. Now, it doesn't need to be a jumper... you could consider any knitted or crocheted garment... such as cardigan, jacket, poncho, dress, scarf, mittens... anything.
3

You can jump straight in and felt the garment as a single piece, but I prefer to separate it a little first. I always recommend removing the sleeves, so that they can be dried as a flat piece... without ending up with a big fold down the centre.

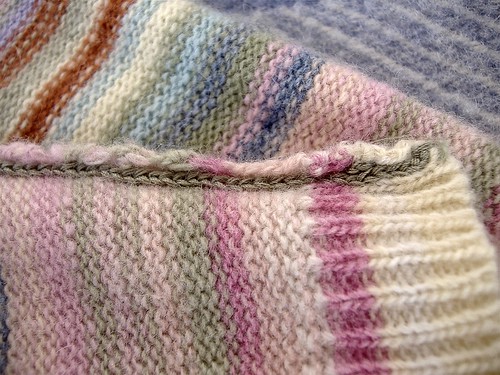
Start by turning the jumper inside out, and look at the seams starting from the inside wrist. If it is a store bought jumper, then hopefully the seams will look like this...
4

See that magnificent row of chain stitches? That is going to unravel so easily. See how they are all 'pointing' to the left? That is the direction you will need to unravel in. Most seams I find unravel from the wrist, to the arm pit and then down to the waist. But it's worth checking the direction that the chains 'point'... because some manufacturers trick you by going the opposite way!

Start to unpick the stitches, and find yourself the 'magic tail'. The magic tail is the very end of the thread, and when you pull gently on it... all those little stitches unravel by themselves.
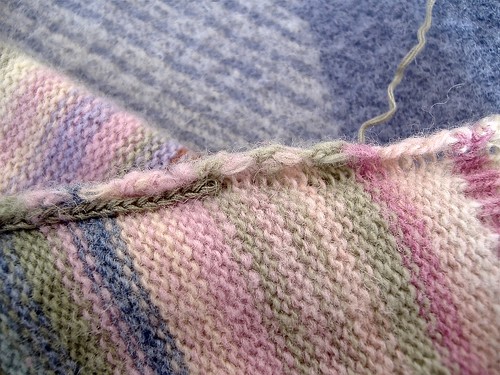
5

If you are working with a hand knit, you will just have to slowly unpick each stitch... depending on how the individual has seamed it.

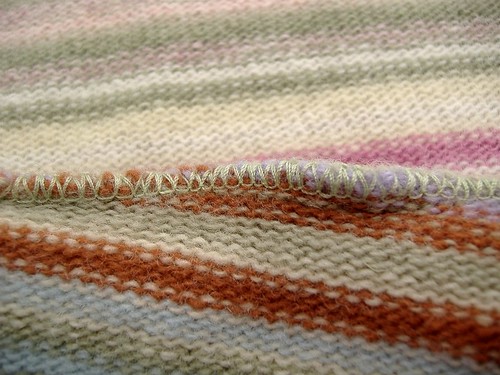
If the seams are overlocked or serged and look like this...
6

RUN AWAY! NO... you don't really need to run away... but you are better off leaving them alone and felting without unseaming.

7

So here I have my jumper. The sleeves have been removed. I have also undone the side seams, but not the shoulder ones... as the garment was serged at that point (this is often the case) If there were any buttons, zips, clasps, etc. I would also have removed them before felting. Make sure you hold on to them, because they will definitely come in useful one day!

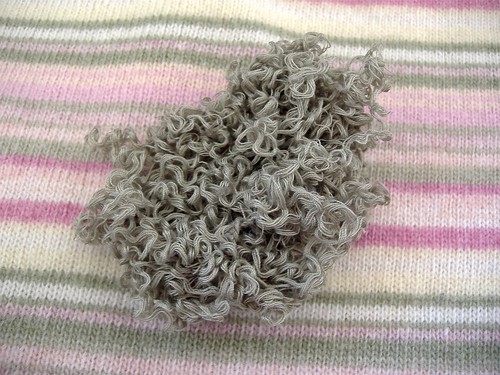
I also keep the leftover threads. They can always be used for something. Maybe stuffing or padding for another project? My kids like the 'curly bits' for their craft box, and will often paste them onto a collage... or add them as hair, grass, clouds, etc. to their drawings. Some people like to leave them outdoors so that the local birds can add them to their nests.
8

click here for the next steps in the felting process
Thursday, July 3, 2008

felting old jumpers

I love felting!

I know that the 'correct' term to use in this instance is fulling... but let's face it, everyone calls it felting, and I will only confuse us all if I start calling it something different.

Just to clarify though... true felting is a process which uses raw wool. That raw wool is treated with moisture, heat and friction... causing it to 'matt' together as one piece

In the process of fulling, you are working with wool that has already been spun and woven/knit/crocheted. Again you treat it with moisture, heat and friction... causing it to 'matt' together, so much so that the original stitches can no longer be identified.

Have you ever destroyed a hand knit garment, by running it through the washing machine? Of course not... but maybe your Significant Other did... or one of the kids. The garment would have shrunk, and stiffened, and no longer been wearable, right? That's because it had been 'felted'. It was treated with moisture, heat and friction. The fibres matted together and the original stitches could no longer be identified!

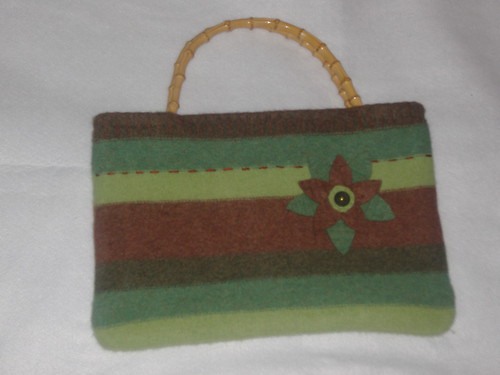
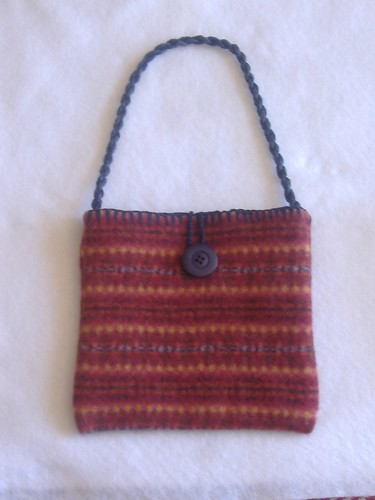
When I first started reclaiming yarn... I made a point of looking for fibres that were 100% wool so that I could use them for felted projects. So I would take the wool jumper, unravel it, skein it, wash it, dry it, ball it, knit it, and then felt it. Too much work, hey! Then it dawned on me that it would be much more time effective to felt the jumper as is, then sew it into a bag.

These are my first attempts at jumper to bag conversions...

before

after ~ laura

and this one...

before

after ~ megan

Today I am going to sort through my 'frog pond' and select some jumpers for felting. I'll take some before and after shots so that I can provide a photo tutorial for anyone who is interested.

Tuesday, April 29, 2008

just not feeling the love

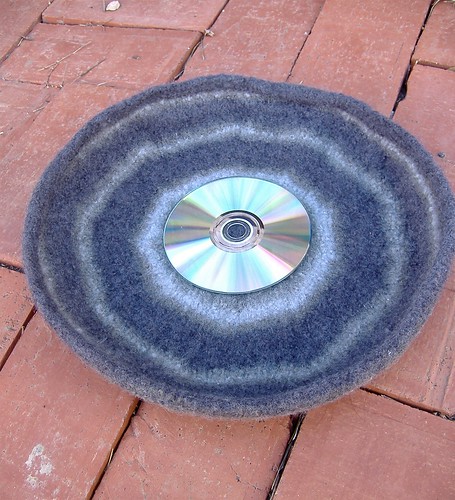
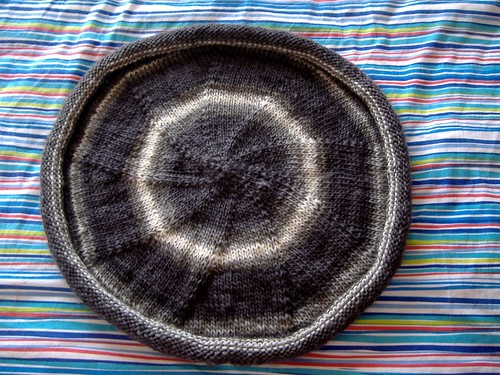
Really not feeling the love for this felted bowl. It has finished drying, but remains floppy... and I really don't like the shape of it. Plus I'm finding the grey colour to be very drab.

All is not lost though... I am working on a makeover for it... next time you see this boring floppy felted platter, you might not recognise it

felted bowl (bricks)

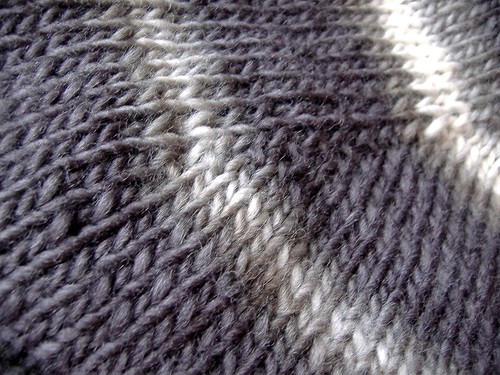
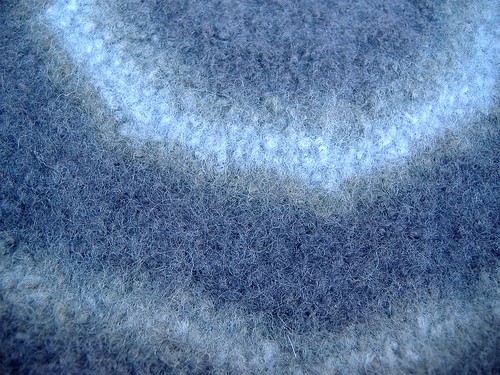
Just a couple of photos for those of you not familiar with the effects of felting... or 'fulling' as the purists would call the technique. Some before and after close up shots which show clearly what becomes of your stitch definition.

felted bowl (before stitches)

felted bowl (closeup)

Monday, April 28, 2008

ugh... what's that dreadful smell

Wet wool... is there anything that smells worse?

How about hot wet wool... definitely much worse!

For those of you not familiar with the felting process, I'll give you a quick rundown of how it works. Basically you take your beautifully knitted project and subject it to hot soapy water and lots of agitation. Treat it as badly as you possibly can, until the wool becomes matted and you can no longer identify the individual stitches. Then shape it a little and allow it to dry.

I use a front loader washing machine. Of course front loaders are renowned for their gentle delicate washing motion. I don't want gentle. I don't want delicate. I want ABUSIVE. But my machine doesn't have an 'abusive' cycle, so I improvise by adding a pair of gumboots and some old jeans into the load. (Don't make the mistake of including clothing you would ever want to wear again.) I set the water temperature at the highest setting. You need to pop the item into a separate wash bag or you will clog your filters with lint and destroy your washer. Add the soap and away you go. Important not to let the machine go through its spin cycle, or you will ruin the shape of the item.

When the washing is done, you remove the hot, wet, stinky mass from the machine. Ugh. It does not smell good. Reminds me of high school on a cold wet day. The smell of wet woolen blazers. Ugh. Everyone crowded around the heater trying to warm up, and the smell of that wet wool fills the room. Makes you feel claustrophobic. Ugh. Funny the memories that come with particular smells. Suddenly I feel like an awkward teenager again. Ugh.

Pat dry. Shape. Allow a couple of days to air dry thoroughly.

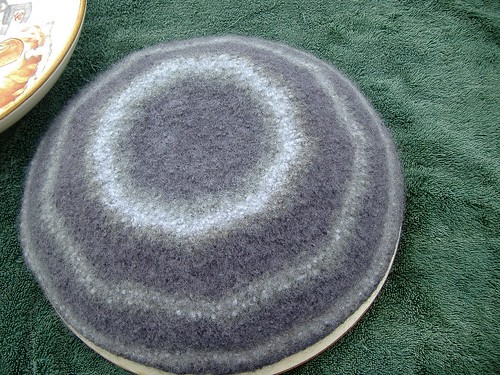
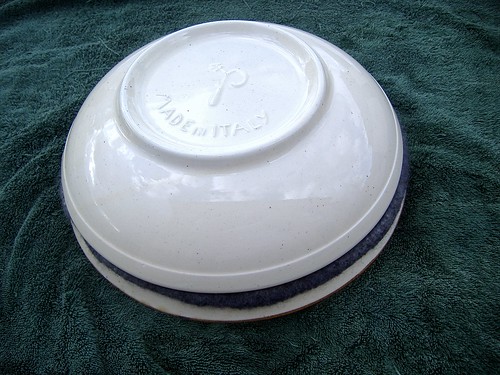
That's where I'm at at the moment. Making use of a couple of large pasta serving bowls. I'll keep the felted bowl sandwiched between them to try and give it some shape. It needs all the help it can get. I think it's going to be a very floppy bowl. If I was using this pattern again I would definitely use double stranded yarn for extra stability.

felted bowl drying

felted bowl drying (sandwiched)

Sunday, April 27, 2008

felting again

Decided to have another bash at this whole felting business again. I find the process fascinating. The very idea of mistreating your knitted work so badly that it destroys the stitches and felts to itself seems ridiculous. And yet it is so very popular at the moment. I'm always curious to compare the 'before' and 'after' photographs which people take of their work.

This project is a felted bowl. It is going to be very shallow and flat. I've worked it according to the pattern, but I don't particularly like where it's heading.

But you never know quite what the post-felting look will be... so I'll stick with it. Even if I don't like the end result, I'm sure I will be able to add embellishments until it is no longer recognizable!

Wish me luck...

felted bowl (before)

and just to give you an idea of the actual size... here it is pictured with a DVD

felted bowl (before with dvd)