Showing posts with label rags. Show all posts

Wednesday, June 4, 2014

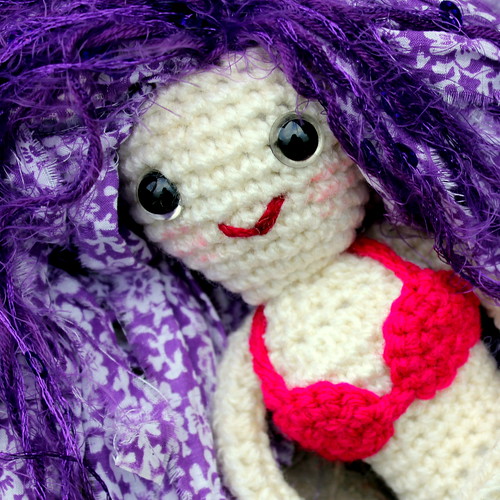
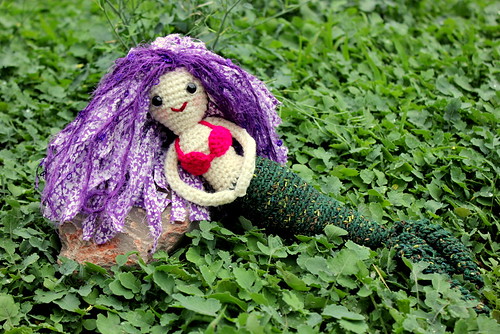
I call her Jodie...

Raggedy Rascal of the Sea

It's been a little while since I've made a toy... those flowers and beanies have kept me very busy!

But I've been asked to make some more mermaids for sale at Just Planet Gift Shop and Cafe in Sunbury... so it's time to pull out the safety eyes and stuffing... and start creating some characters.

Raggedy Rascal of the Sea


 I'm working from one of my own patterns: Roweena the Raggedy Rascal of the Sea.

The fully tested pattern is available in PDF format, for AU $4.50 - you can click here for more information, including the link for purchasing.

And if you'd like to see some of the mermaids made by other people using my pattern - click here.

As for this mermaid - I call her Jodie - after my real life, purple-haired friend!

Raggedy Rascal of the Sea

Wednesday, July 25, 2012

Time for some sewing...

Hakelbeutel Bag

Had a bit of a sort through the fabric stash today and chose the lining material for My Hakelbeutel. As you can see it's an off white fabric with a black floral print.
I don't like to be all matchy-matchy with my linings, so I like the idea of a simple black and white.

Hakelbeutel Bag

This remnant came from my Grandma Maria (my Mother-In-Law)
Maria is a professional dressmaker, thought it's years and years since she's worked in the industry... A couple of years back when she moved house (after 40 plus years in the same place), she had a HUGE fabric de-stash - and this is one of many remnants which came to live with me!

Rag Bag
 
While I have the sewing machine and the fabric out, I'm going to line another bag...

This Rag Bag was stashed away in the same UFO box (that's Un Finished Object box) as the Hakelbeutel. It dates back a few years, too. I remember making it on a Crochet Weekend back in 2010, I blogged about the weekend but I don't think I mentioned this bag...

It's made from rag strips which are about 1cm (1/2 inch) wide and I think I used about a 7.0mm hook. I followed the Easy Peasy Crochet Bag pattern, and added a buttonhole handle...
All that left to do is the lining, and maybe an embellishment.

Rag Bag

And I'm thinking that depending on the amount of material left over - 
it will become a top or a dress for either Katie (age 8) or Charlotte (age 1)

But for the moment, the fabric is drying... 
and I'm working on the secret handles... 
which may or may not be successful... 

we'll both have to wait and see on that one!


Wednesday, January 25, 2012

C is for Charlotte

'Twas the Night Before Christmas,

And all through the house,

Not a creature was stirring...

Not even a mouse.
 
IMG_0338

When I suddenly realised that I had TOTALLY FORGOTTEN to make a Christmas Gift for my baby girl!!!

Aaaarghhhh... how could that possibly be?

That gorgeous little baby, the one I spend almost every waking hour with... how could I possibly have forgotten her???

OOPS.

So it had to be something quick, and something that I had all the materials on hand for.

As you can see... I went with the Rag Wreath idea, starting with a cardboard C.

It looks gorgeous hanging on her bedroom door, and all I really had to do was tie some knots

IMG_0337

Thursday, November 24, 2011

Christmas Wreath - Scrappy Style

PB160010

Can you believe that it has been THREE WHOLE YEARS since I shared my Rag Wreath Tutorial???

Definitely time to make another one!

(a wreath, that is... not another tutorial)

This was made for a Christmas Decoration Swap... where we had to make something for under $5... All I needed was some thick cardboard, fabric scraps, a little embroidery thread and a few buttons.

Oh, and a small brass ring for the wreath to hang from.

It started out like this:

PB110033

... but it seemed a little bland, so I added a padded heart to the centre:

PB160009

Much nicer now...

And here it is hanging on my front door:

PB160007

Not for long, though... It had to be parcelled up and mailed away to my partner Deb.

And would you like to see what Deb sent me in return???

Well, first there were these two lovely crochet hearts for my Christmas Tree. I especially love the beads which weight them down perfectly, as well as adding some extra pizzazz!

PB210003

Next is this door hanger... complete with a button Christmas Tree - how cute

PB210008

And also this pot holder... you can see that it has been made from recycled denim... that dark area is where the pocket has been removed from. What a fabulous idea. I think I might be making a few denim pot holders for everyday use here - I love the idea. And they'll match that denim apron I'm working on too.

Not that things around here really have to MATCH! It's much more fun if they don't.

PB210009

Wednesday, June 2, 2010

make your own rag coasters

rag coasters, 3

These practical coasters are quick and easy to make, using scrap or recycled materials. You require only basic crochet skills.

You will need:

  • rag strips cut to 1 inch thick - see my tutorial here

  • kitchen string

  • 7.0mm crochet hook

  • 4.0mm crochet hook

IMPORTANT TIP: keep your stitches loose when working with rags, or you will have difficulty inserting the hook to make stitches

material and hook

Begin with an Adjustable Magic Ring.

round 1

round 1 - ch1, 10sc into ring, pull tail to tighten, join to 1st sc with a ss.

round 2

round 2 - ch1, inc in each st, join to 1st sc with a ss (20sc)

round 3

round 3 - ch1 [inc, sc] repeat to end, join to 1st sc with a ss (30sc)

progress

use 4.0mm hook to weave in ends

finished

round 4 - use 4.0mm hook and kitchen string, work sc into each stitch from round 3, join to 1st sc with a ss (30sc)

P6010033

weave in ends and you're done!

Sunday, December 7, 2008

I'm back

Recently I shared with you a Christmas wreath which I had made from rags. I loved that it was made entirely from recycled materials... but the colours I chose were far too subtle for my taste! Very unusual for me to play it safe with colour. I'm not at all sure what was going on there. Subtle - tasteful - safe - reserved - it's like I was possessed!!!

click here to see the original wreath, and the instructions for how to make one

Well - I'd just like to announce that I'M BACK

My home has been treated to a much more suitable wreath... which better reflects the people inside! It's a little smaller than the last one, but I love it.

I have to say a big thank you to Mrs S... who I know stops by this blog from time to time. Thanks for thinking of me when you sorted through your fabric stash. Those scraps which were useless to you, have created my wreath. I even used the cardboard box (which you sent them in) to cut the base from. I thank you... and my front door thanks you!

The wreath just needed a little something extra... so 'borrowed' a bell from our Christmas tree, to complete the look.

bright rag wreath

Friday, November 28, 2008

rag wreath

It was time for a new Christmas wreath at our place...

I love to place a wreath on the front door for the holiday season. I bought a really nice simple one, several years back... but last year I had to throw it away. Our front door gets a strong dose of morning sunlight - remember - I'm in Australia... so Christmas time is SUMMER. Anyway, the embellishments on the wreath were made from coated styrene, and they cracked, popped and exploded last season.

Of course I didn't actually throw the wreath away. The decorations are gone, but I have kept the base. I was planning to re-decorate it for this Christmas... but then I had a change of heart, and decided to make a rag wreath instead!

finished wreath on door

Because of the strong morning light, I was concerned that my colours would fade too quickly. So I decided to make this up in very neutral tones.

Bad move...

I hate it!

Well... I don't actually hate it... it's just not very ME. It's subtle and neutral, and OUT OF PLACE on my front door! I need colour

So, I will be making another one... with a bit more life to it.

EDITED TO ADD PHOTOS OF OTHER SCRAP WREATHS I HAVE MADE

PB160010

bright rag wreath

But for the moment, I will show you how this one came together. It's a very simple process.

001
I have a plentiful supply of rag balls here, so I grabbed a handful in the colours which I wanted (or thought that I wanted)

002
marked out a large circle on a piece of strong cardboard

003
and a smaller one inside

004
cut out the ring shape

005
started to tie on the rag pieces

006
added some more

007
and some more

008
just to give you an idea how the back looks at this point...

009
then tied on some more rag strips until it was full

I made a twisted cord from rags, tied it into a bow... and stitched it into place... click here for twisted cord instructions

I've also trimmed the tails on some of the rags to a shorter length.

Fast - Fun - Easy - which is good news for me, since I now want to re-make it in a more colourful manner!

Tuesday, October 28, 2008

something new to try...

Spotted this at the op shop the other day, and I couldn't leave it lying on the shelf:

pink ribbing

Two rolls of lightweight pink ribbing. I guess it's the type that would be used as a trim on t-shirts or similar, but of course I won't be using it for that!

Actually... I'm not entirely sure what I will use it for! My initial thoughts are to crochet it into a rug or a bathmat using a giant hook. But maybe that's a bit obvious?

I'm open to all sorts of suggestions. Any other ideas out there???

Monday, September 8, 2008

apple bag using rags

2008_0907apples30004

In the interest of experimentation (which as you all know, I am a huge fan of) I decided to make another 'apple bag' this time using fabric strips.

2008_0907apples30003

This one was from an old doona cover (quilt cover) and I added a trim using kitchen string, just to be sure the handles were strong enough. I've embellished with a square of curtain netting, a ply starfish (from my scrap booking days) and a button.

2008_0907apples30002

It's just as stretchy, and easily holds 35 apples!

Saturday, September 6, 2008

hooked

Who says size doesn't matter???

I AM HOOKED

The 20.0mm hook is amazing... I definitely have to get me one of these! It might not have the finesse of some of the more delicate hooks, but golly it's fast.

1

I started playing around with it this afternoon.

2

Found some flannelette strips leftover from my knitted bath mat, and decided to attempt a crochet version.

3

ch 35

4

turning ch, then sc into each of the 35 stitches

5

change colour and turn work at the end of each row... I worked about 30 rows

7

don't worry about weaving in ends, just knot them together and trim to a few cms

9

It's huge! (those are adult size shoes in the photo)

I love it. Best of all, it worked up in a couple of hours - unlike my knitted one, which seemed to take forever. It's also 'sturdier' than the knitted version.

Thursday, August 28, 2008

anatomy of a rag bag

Want to see how the easy peasy crochet bag works up in rags???

15

I've cut my fabric into half inch strips using this method, and used an 8mm crochet hook. Because the fabric does not 'give' in the same way which yarns do, there is a tendency to work with too much tension... which results in painful wrists. My recommendation is that you focus on keeping your tension loose. Relax your grip. Perhaps even change your technique a little. For example, I would usually grip the hook in a 'pen-like' manner... but when working with rags I switch to a 'knife-like' grip. You just need to experiment a little to find what works for you.

This will be a multi-coloured bag, to use up some of my oddments of rags. When changing colours you can use this method to join in the next 'yarn'.

1

I'm starting with this assortment of rags. I have 10 different prints here.

2

Here's the 5 starting chain, plus a turning chain for luck!

3

Now the 5 sc... and another turning chain

4

20 rows of sc and the base is complete

5

Starting round of sc along the sides of the rectangle

6

Keep spiralling around in sc.

7

15 rounds of sc and the body is complete

8

Time to choose a colour for the trim. I like to pick one of the colours in the bag to accentuate. In this case I would choose either the green, blue or red. The green will be too gaudy for my taste... a little in the bag is fine, but I don't want to make it more of a feature. Blue is not a bad choice, but a bit too subdued. I'm liking the red.

9

Picot trim in red using a 4.0mm hook and thick cotton.

Choosing a colour for the handles. Nothing too bright, I'm going to go with navy.

10

3 starting chain, plus a turning chain for luck...

3sc plus another turning chain... repeat until desired length

then make another exactly the same

11

Add some colour.

12

Attach handles to bag.

14

Pop in the lining... tutorial here

13


I've added an old clip-on earring as a removable embellishment, and the job is done!